

Dynamics 365 empowers organizations to streamline processes and gain valuable insights. A critical requirement involves updating the columns in the form table to store the values of the ‘DownloadBy’ and ‘DownloadDate’ columns. This involves fetching the date and username from the browser when the ‘Export to Word’ button is clicked. With the Power Apps Component Framework (PCF), customization becomes a breeze. In this blog post, we’ll explore how to dynamically update these fields within a PCF control, using the Document Template Manager PCF control as our foundation. This ensures that the stored values are appropriately displayed in the document template when it is downloaded.

Prerequisites
Before we embark on enhancing the control with integrating ‘downloadBy’ and ‘downloadDate’, it’s essential to ensure that you have the following prerequisites installed in your development environment:
- Visual Studio Code (VSCode) with “Add to PATH” selected during installation.
- Node.js (LTS version for stability).
- Microsoft Power Platform CLI:
- Power Platform Tools for Visual Studio Code or Power Platform CLI for Windows.
- .NET Build Tools:
- .NET Core SDK (cross-platform .NET framework) or Visual Studio with “.NET build tools” workload.
Implementing ‘Download By’ and ‘Download Date’ Functionality
Step 1: Set Up the Document Template Manager PCF Control
Clone or download the Document Template Manager PCF control from GitHub. Open it in VSCode and use the integrated terminal to install necessary Node modules with npm install.
Step 2: Adding ‘DownloadDate’ and ‘DownloadBy’ Properties
In the ControlManifest.Input.xml file, add the following lines to define the metadata for ‘DownloadBy’ and ‘DownloadDate’ columns:
<property name="DownloadBy" display-name-key="DownloadBy" description-key="Download the file by the specific person" of-type="SingleLine.Text" usage="input" required="false" />
<property name="DownloadDate" display-name-key="DownloadDate" description-key="Download the file on the specified date and time." of-type="SingleLine.Text" usage="input" required="false" />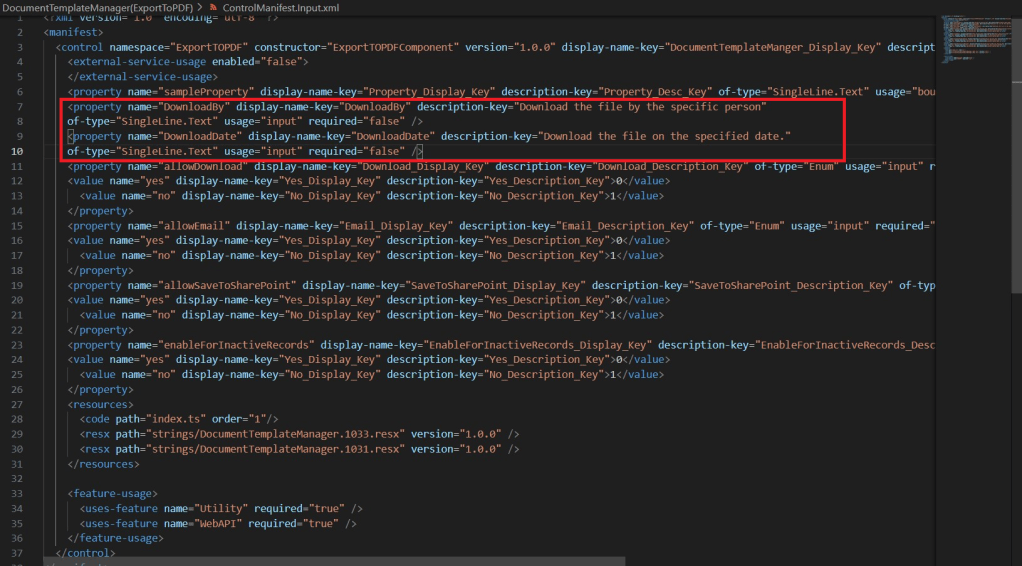
Note: It’s essential to update the ManifestTypes.d.ts file after adding the code by running the command npm run build. This step ensures that your PCF component correctly recognizes and utilizes the newly added property.

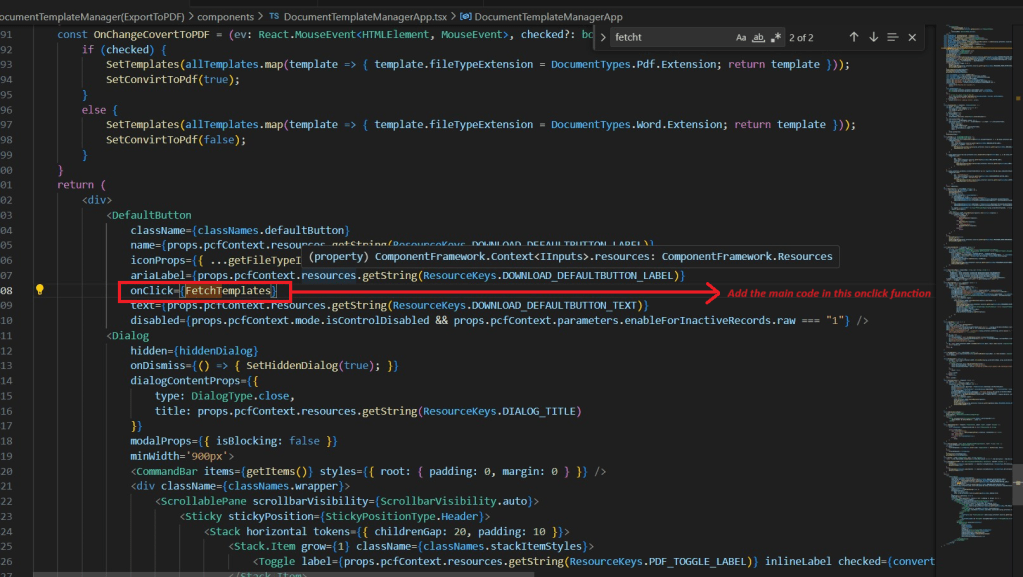
Step 3: Updating the PCF Control Code
Navigate to the DocumentTemplateManagerApp.tsx file in the components folder. Update the code within the onClick function of the Export To Word button to dynamically include the logical names of ‘DownloadBy’ and ‘DownloadDate’:
const currentDate = new Date().toISOString();
const currentUsername = props.pcfContext.userSettings.userName;
const recordId = (props.pcfContext.mode as any).contextInfo.entityId;
const tableLogicalName = props.primaryEntityName;

// Retrieve the logical names for 'DownloadBy' and 'DownloadDate' from properties
const downloadByLogicalName = props.pcfContext.parameters.DownloadBy.raw;
const downloadDateLogicalName = props.pcfContext.parameters.DownloadDate.raw;

console.log(`Logical Name of the Table: ${tableLogicalName}`);
console.log(`DownloadBy: ${downloadByLogicalName}`);
console.log(`DownloadDate: ${downloadDateLogicalName}`);

if (!recordId) {
    console.error("RecordId not available.");
    return;
}

const dataForUpdate = {
    [downloadDateLogicalName]: currentDate,
    [downloadByLogicalName]: currentUsername,
};

try {
    // Perform the update using the Web API
    await props.pcfContext.webAPI.updateRecord(tableLogicalName, recordId, dataForUpdate);
    console.log("Record updated successfully.");
} catch (error) {
    console.error("Error updating record:", error);
}
Step 4: Creating a Solution Package
With your PCF control built, it’s essential to package it correctly. Open the terminal, change the directory into the solution folder, and run the following command to create a solution package for your PCF control:
pac solution init --publisher-prefix your_prefix --publisher-name your_nameReplace your_prefix and your_name with the appropriate publisher prefix and publisher name.
Step 5: Adding the PCF Control to the Solution
With your PCF control built, it’s essential to package it correctly. Open the terminal, change the directory into the solution folder, and run the following command to create a solution package for your PCF control:
pac solution add-reference --path ./your_control_folderReplace your_control_folder with the actual folder path where your PCF control is located.
step 6: Build the solution Zip File
Open the Visual Studio developer command prompt and change the directory into the solution folder. Run the following command to build the solution zip file:
msbuild /t:build /restore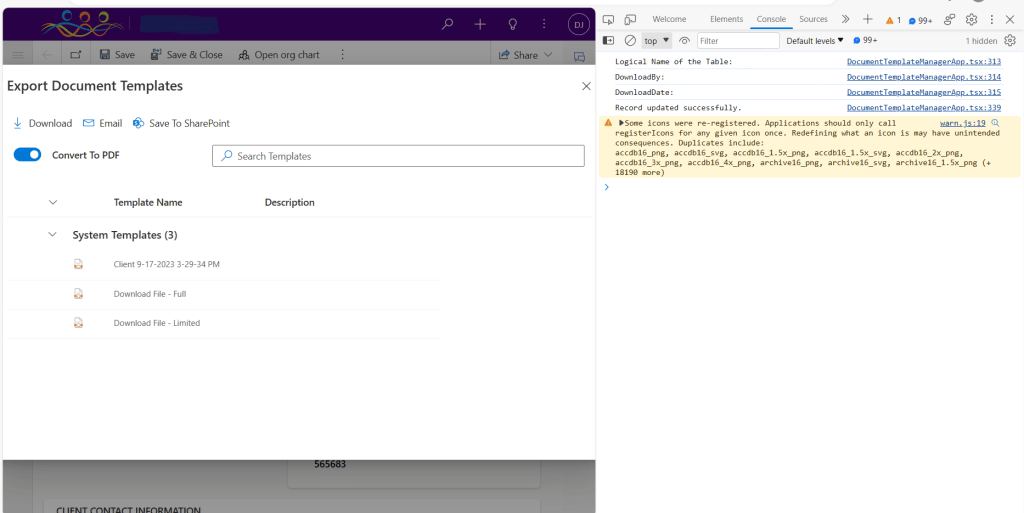
GitHub Repository
Explore our GitHub repository here for a hands-on experience with the enhanced Document Template Manager PCF control.
Conclusion
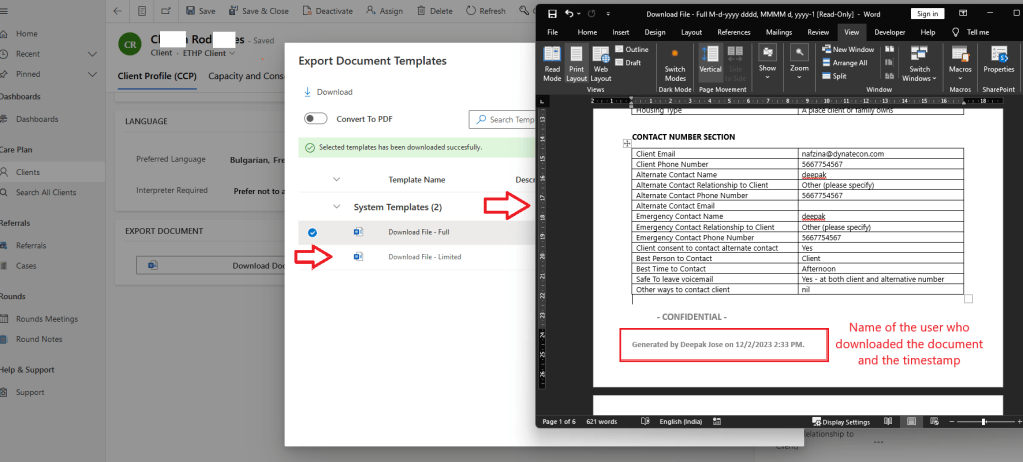
With the power of PCF, Dynamics 365 customization becomes flexible and user-centric. The addition of ‘DownloadBy’ and ‘DownloadDate’ fields in the Document Template Manager PCF control enhances document template management, providing valuable insights into user interactions.
We can include the name of the user who download the document and the timestamp in the document.
Stay tuned for more Dynamics 365 customization tips and tricks!
