

The integration of Azure DevOps with Dynamics 365 offers numerous benefits for organization. First and foremost, it enables organization to have a unified view of all their work items, including user stories, bugs, and tasks, within one platform. Another advantage of this integration is the ability to link work items to specific Dynamics 365 records and can easily track the progress of their work in relation to a particular customer or project in Dynamics 365.
In conclusion, the integration of Azure DevOps with Dynamics 365 brings together the best of both worlds – the agile and collaborative development environment of Azure DevOps and the powerful business capabilities of Dynamics 365.
REQUIREMENT:
In this scenario we have to create ‘Bug report’ from CRM Case form and syn it with Azure DevOps.

fig 1. Process Flow chart.
SOLUTION:
Step 1: Initially we have to create a ‘Case’. And fill the required fields.
Step 2: From the ‘Bug Reports’ grid create a ‘New Bug report’, then we will direct to a custom page of the bug report.

fig 2.
Step 3: Open the Custom page, and in the custom page we have added a custom button ‘Create ADO Bug’. using the ribbon Workbench.

fig 3.
Steps involved in Adding Custom Button using the Ribbon Work bench.
Step I: Download the ‘Ribbon Workbench’ using the below link.
https://www.develop1.net/public/rwb/ribbonworkbench.aspx
Step II: Add the solution into Ribbon workbench. From the dynamics CRM
Advanced setting > Setting > Solutions
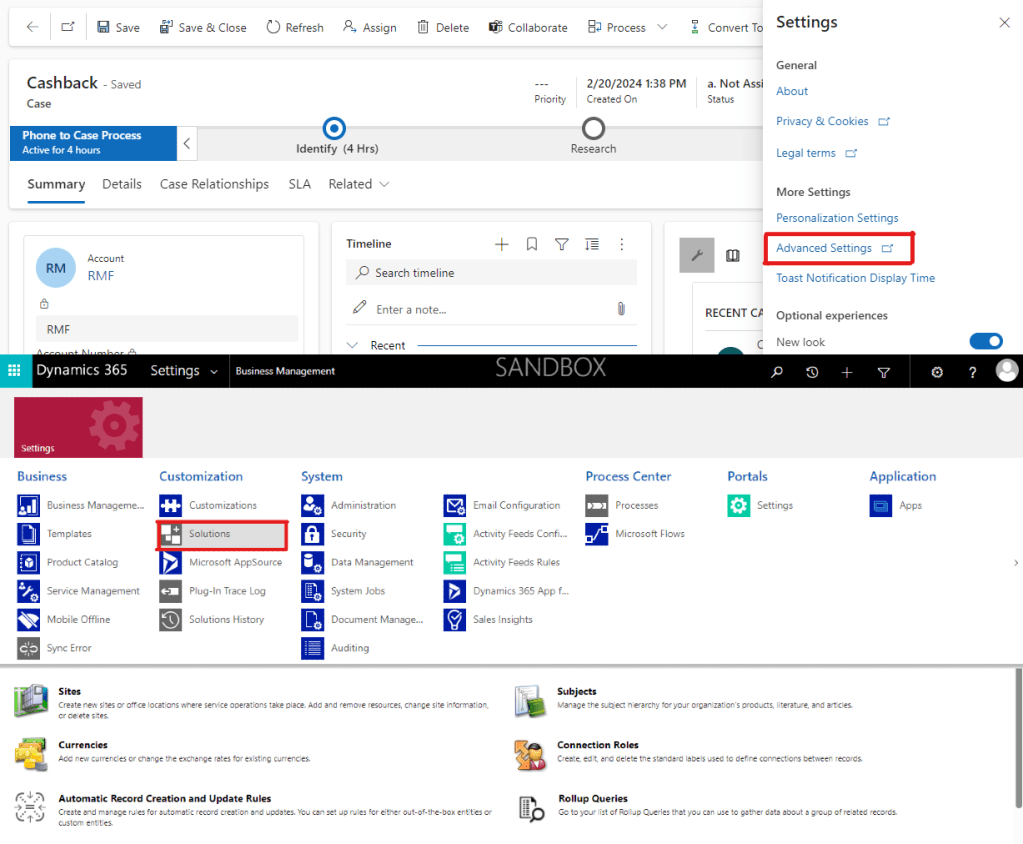
fig 4.
Step III: Click on the new, a custom tab will open and provide the details in the required fields and save it.
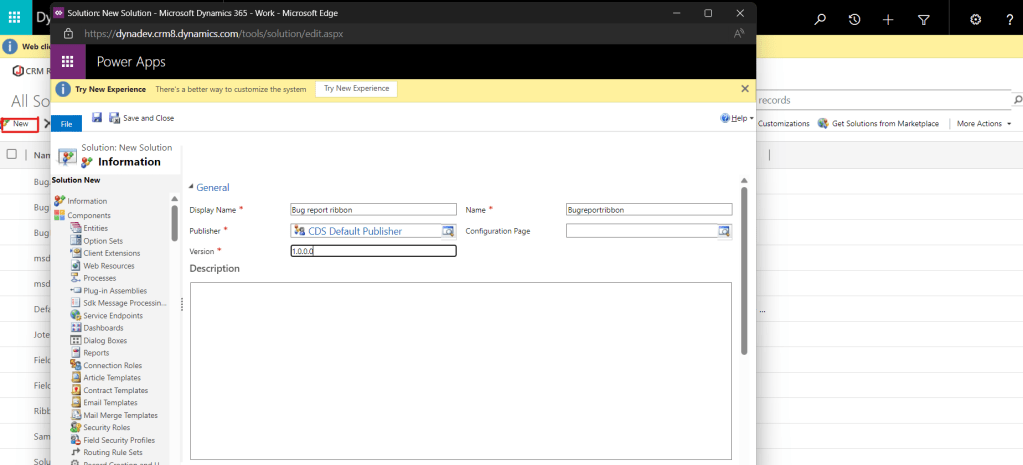
fig 5.
Step IV: If we click save on the aforementioned tab, then it will open another custom tab. In that tab we can select the entity which we needed to add the custom button
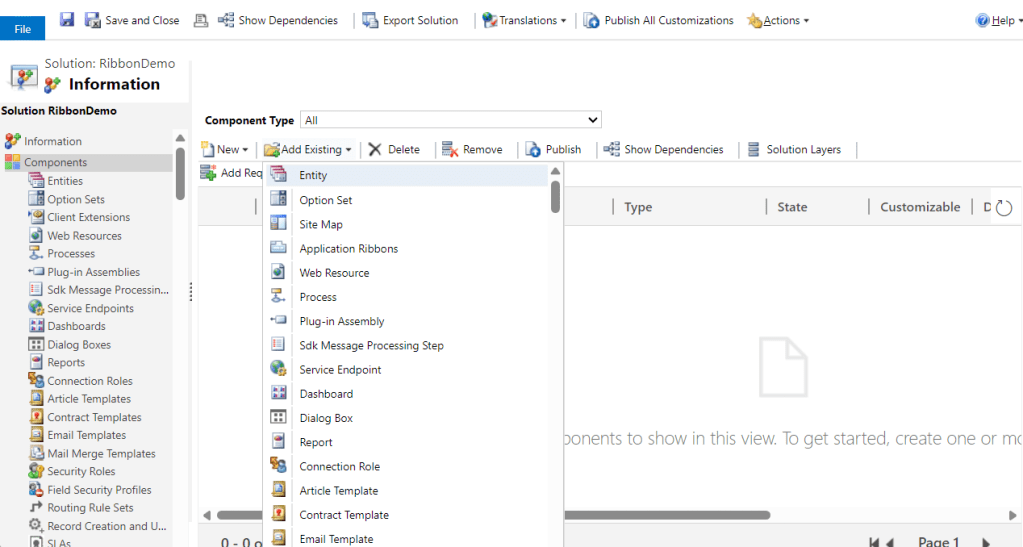
fig 6.
Step V: Select the form, Click finish then select the required components and Click Ok.
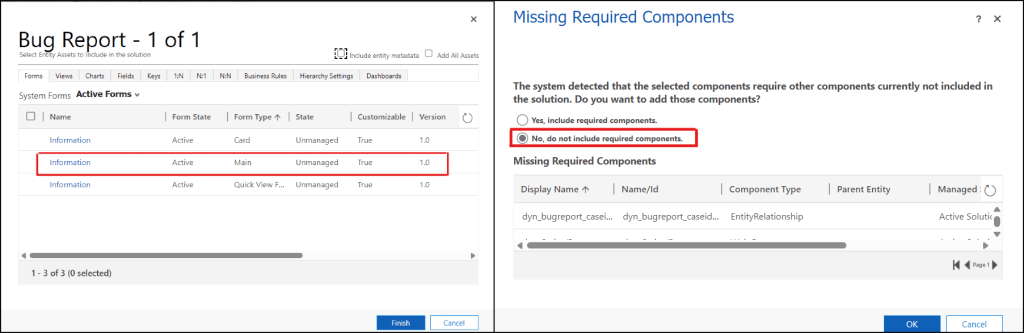
fig 7.
Step VI: Then the required entity will be updated. After that select the ribbon workbench which you have created recently.

fig 8.
Step VII: Drag the Button from the left navigation pane, in our case we are adding the button in the form, name the button appropriately and finally for the working of button we have to add command for the button.

fig 9.
Step VIII: Publish it.
Step 4: When button Clicking, we used to call the API to create bug work item in ADO. From the response, we have the Work Item ID and update that back in Bug Report in the CRM.
For this we are using ‘JavaScript’ and ‘Microsoft flow‘ as well.
JavaScript Code:
async function LaunchFlowADO(bugid) {
    if (bugid != null) {
        bugid = bugid.replace("{", "").replace("}", "");
    }
    console.log(`BugId is ${bugid}`);

    var input = JSON.stringify({
        "bugid": bugid
    });
    console.log(input);

    var flowUrl = "https://prod-04.centralindia.logic.azure.com:443/workflows/dfea796e02584e2796f775f9add3b54a/triggers/manual/paths/invoke?api-version=2016-06-01&sp=%2Ftriggers%2Fmanual%2Frun&sv=1.0&sig=-nRTjYzZZO2W9YcBs6KsueVGtwxoQ4gjKjEb5fD3X4s";

    try {
        const response = await fetch(flowUrl, {
            method: "POST",
            headers: {
                "Content-Type": "application/json"
            },
            body: input
        });

        // Check if the response is successful
        if (response.ok) {
            // Call the showPopupMessage function
            showPopupMessage();
        } else {
            throw new Error('Please Save the Bug.');
        }

    } catch (error) {
        alert("An error occurred: " + error.message);
    }
}

function showPopupMessage() {
    // Define the message you want to display
    var message = "The Bug is Created, Please Refresh the page.";

    // Display the pop-up message using the alert function
    alert(message);
}
In the aforementioned code snippet, when clicking on button it will trigger the Cloud flow. and in the code we have used the CRM parameter as ‘FirstPrimaryItemId’.
The Cloud flow diagram is shown below:

fig 10.
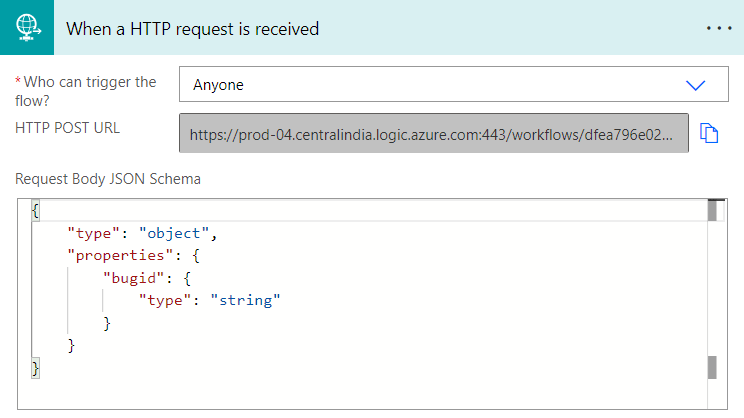
fig 11.
Replace the ‘HTTP URL‘ with which you received from the flow in the above JavaScript.

fig 12.
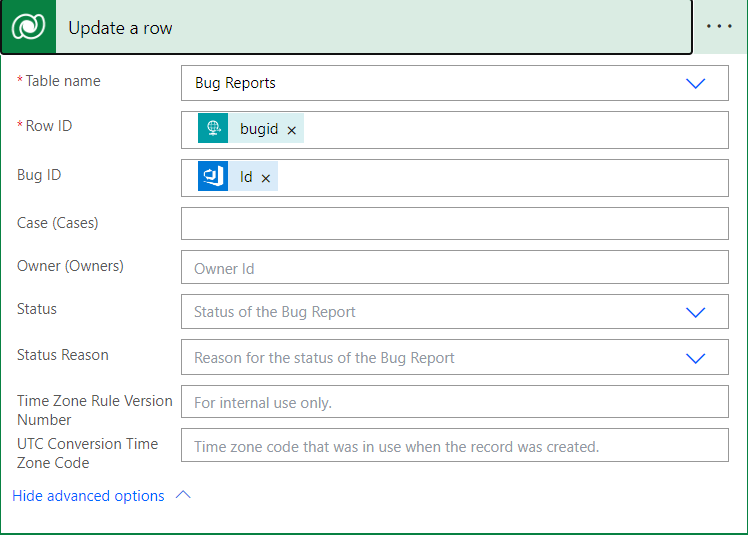
fig 13.
OUTPUT:
When Clicking on the ‘Create ADO Bug‘ Button it will show a pop-up alert and the Bug will create in ADO and the Bug ID will get update in the dynamics CRM.
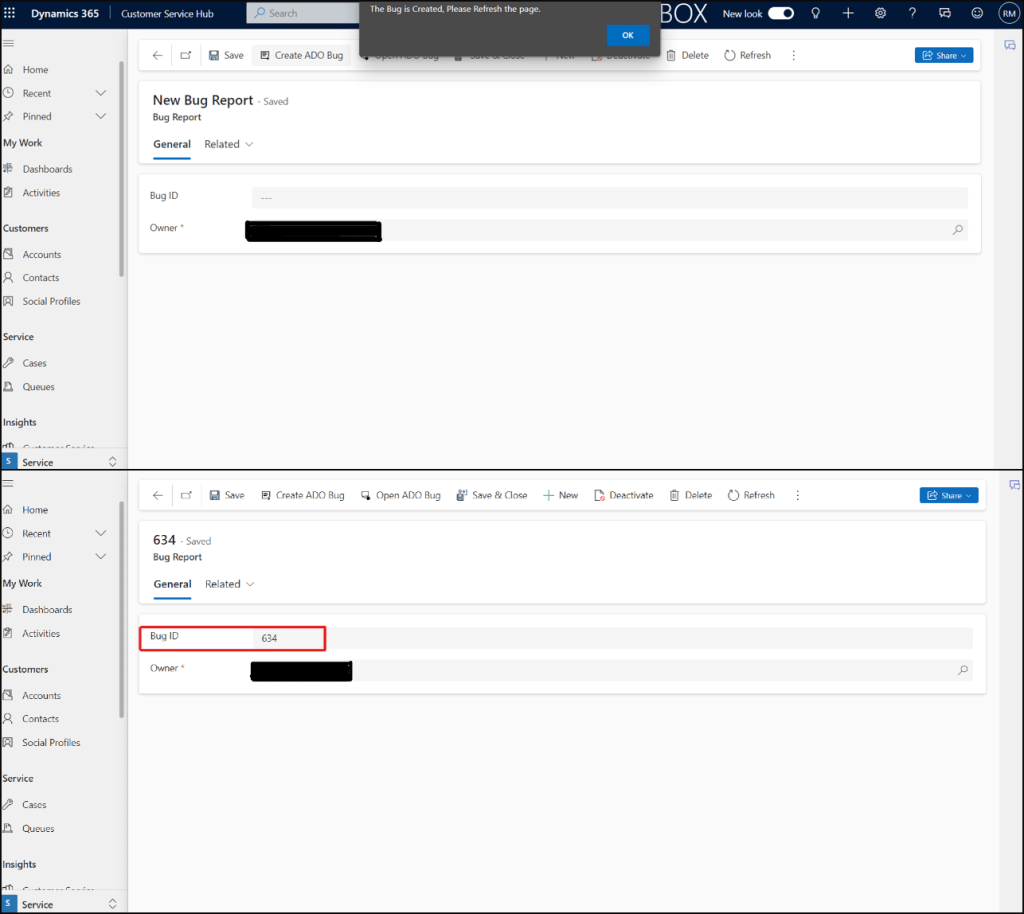
fig14.
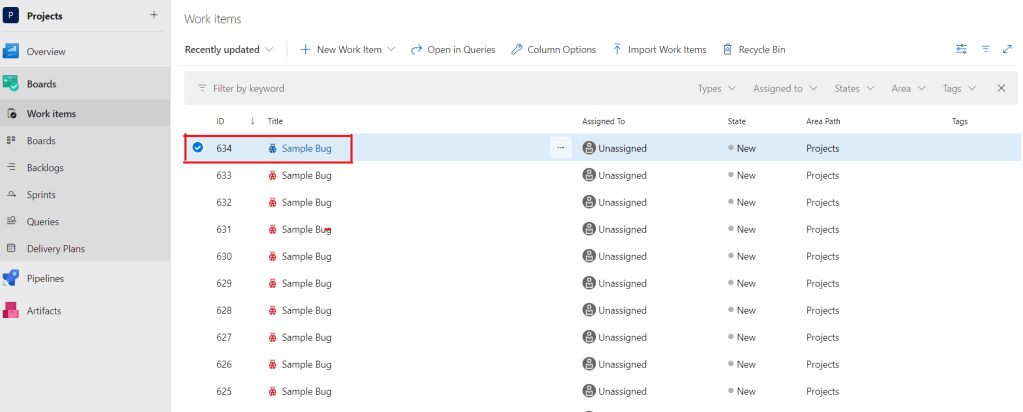
fig 15.
Hope this helps.
