
Well, in order to call HTTP request from canvas app to external resources, you will need to go through a power automate flow and then get response back in the canvas power apps as referred in the figure below.

SCENARIO:
Call a flow from within a canvas power app on clicking a button and capture the response back in the canvas app. In this case, https://reqres.in/api/users?page=2 is the sample HTTP request used. It contains a list of user’s details that need to be called from canvas app via flow and will send these multiple rows containing different user’s details back to the canvas power apps as a response.
From the entire user’s data, only the first name, last name, email and image of different users will be mapped and captured back to the gallery form in canvas power apps.
POWER AUTOMATE FLOW:
Here’s how flow looks:
Step 1: Create an automated flow that will be triggered from the canvas power app on a button click.

Step 2: Make HTTP request from the flow using “GET” HTTP method.

The HTTP method used here is “GET” method for calling the HTTP request in order to get the REST API containing user’s data and for that, a sample HTTP request is used as shown in Fig 2.
Step 3: In this step, “Parse JSON” action is performed in order to breakdown the received HTTP response into a readable data.

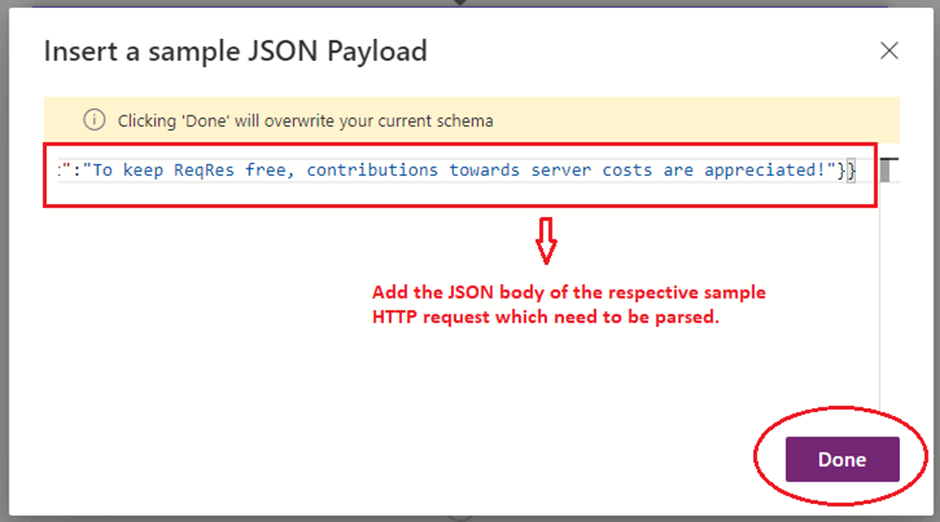

As shown in Fig.3, in the ‘Content’ box give the output ‘Body’ from the response received from the previous HTTP action. In order to provide the sample JSON body, click on the ‘Generate from sample’ and add the JSON body of the respective sample HTTP request (https://reqres.in/api/users?page=2), that need to be parsed and select ‘Done’ as referred in Fig.4 above.
Step 4: Perform the “Select” action for mapping only the required keys from the entire data.
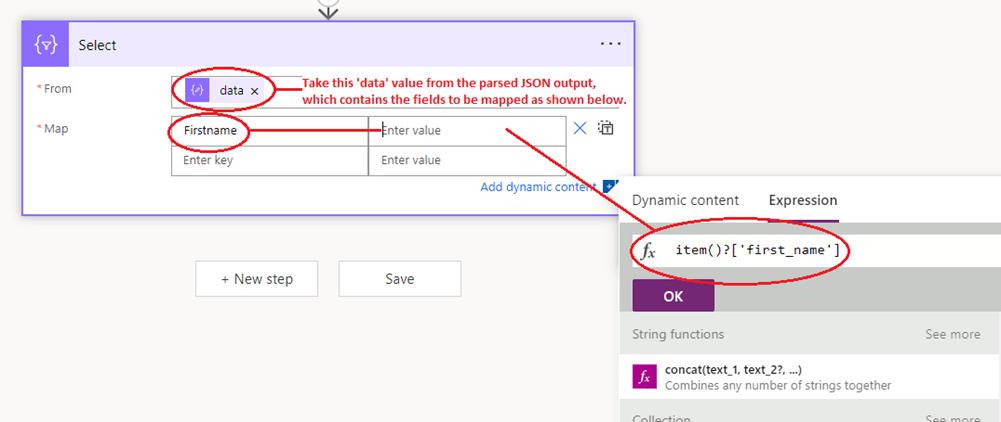
As mentioned in the Fig.6, the ‘From’ box will contain ‘data’ output from the parsed JSON action. In the ‘Mapping’ section, we need to provide the keys such as Firstname, lastname, email and image which need to be mapped from the ‘data’. Also, certain expressions are used for mapping field values, i.e., expression used for the field ‘Firstname’ is shown in the Fig.6 above.
Similarly, for mapping the remaining fields lastname, email and image, the following expressions used are noted in the Table 1 below.
| Keys | Expression (fx) |
| Firstname | @item()?[‘first_name’] |
| Lastname | @item()?[‘last_name’] |
| @item()?[’email’] | |
| Image | @item()?[‘avatar’] |
In the expressions listed in Table 1, ‘first_name’,’last_name’, ’email’ and ‘avatar’ are the schema names of the respective keys got from the “data” in the HTTP request API (https://reqres.in/api/users?page=2).

Therefore, after giving corresponding expressions for Keys as mentioned above, these values are entered respectively to the fields as shown in the Fig 7.
Step 5: Lastly, the ‘Response’ action is done to send back the HTTP response to canvas power apps.

In the ‘body’ column, you need to give the ‘output’ of the previous ‘Select’ action as shown in Fig 8. Click on the ‘Generate from sample’ to insert the sample JSON payload which is the Outputs (JSON body) of ‘Select’ action as noted in Fig 9.


Now, the power automate flow overall looks like this as depicted in Fig 11.

CANVAS POWER APP:
STEP 1: Firstly, insert a button named “GET USERS LIST”.
STEP 2: Add the flow to the canvas app. For that, navigate to “Action” in the menu bar and select “POWER AUTOMATE” option.

STEP 3: To run the flow, add formulas to the OnSelect property of the “GET USERS LIST” button.

STEP 4: Storing the results from flow to an already created collections “UsersList” in this canvas app.

As noted in Fig.14, you can add the formula of the event (storing results to the collection table “UsersList”) to the previously added Run() formula as shown below. ClearCollect(UsersList,GETUSERSLISTBYAPICALL.Run());
For more details about the creation of collections table or using Collect, Clear, ClearCollect functions in canvas power apps, please refer to the link below.
Document Link: – https://docs.microsoft.com/en-us/power-apps/maker/canvas-apps/functions/function-clear-collect-clearcollect
STEP 5: Insert a Gallery form to the canvas app and give the ‘UsersList’ collections table as the data source.

Working: On clicking the button “GET USERS LIST”, the canvas power app calls the flow and the flow runs the HTTP request and sends back the multiple rows of different user’s details as response into the canvas app.
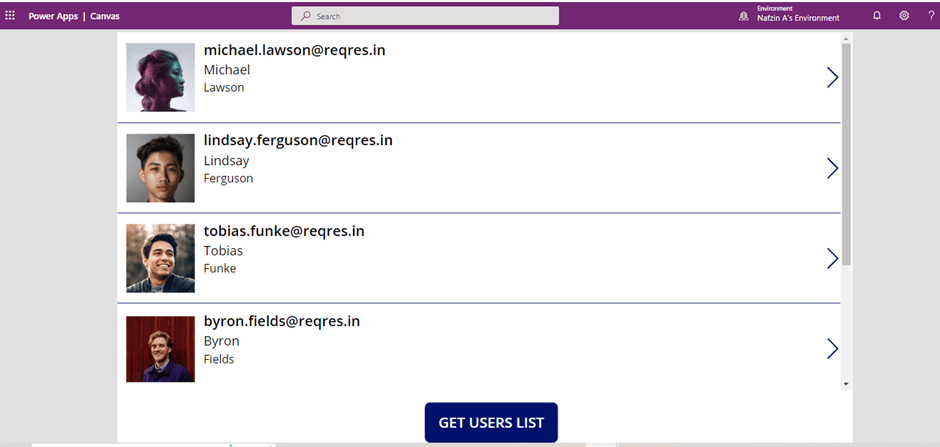
Hence, in the canvas app, the response from flow gets stored into the collections table “UsersList” that will be displayed in gallery form as depicted in the Fig.16 above.
Hope this was useful!
