

The model-driven app and Microsoft Dynamics 365 do have inbuilt customizations up to a great extent. But for more specific customizations JavaScript is a much better tool.
Here is an example of form level notifications applied to a form. The notification options available at form-level are: Error, Warning and Information. These notification options have different icons as shown in the image below.

Below is the JavaScript code that was used to generate the notifications shown in the image above. Therefore, every time a user opens up the form, these notifications will always appear at the top of the form.

Notification based on filed condition
We need to set the notification when a particular field is empty and also the notification must be cleared when the field contain value.
In our case we are considering the tab named ‘Next Action’ and the fields ‘Follow up Date’ and ‘Next Action’. A notification stating ‘Follow up date or Next Action is Empty’ must be shown when either or both the fields ‘Follow up Date’ and ‘Next Action’ are empty. And also, the notification must be cleared when the fields contain value.

In the Fig 2 the notification is shown as both of the fields are empty.
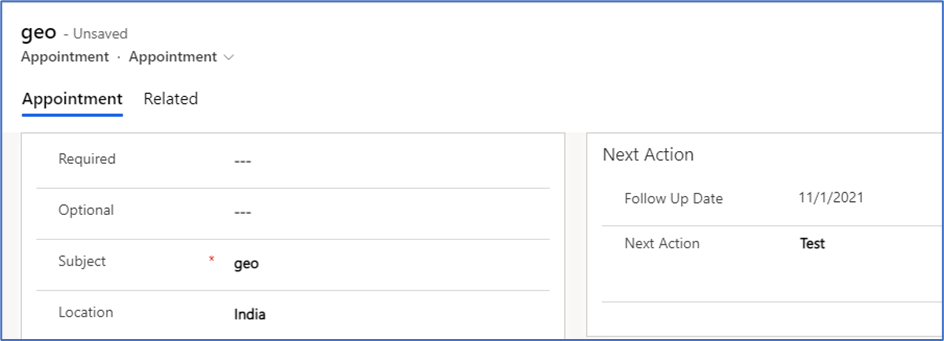
From Fig. 3 it is clear that the notification is cleared when the fields contain value.
Below is the JavaScript code that was used to generate the notifications shown in Fig.2 and Fig.3

How to add the JavaScript as web content
Step 1: Write the JavaScript code in any platforms like VS code, Notepad++ etc.
Step 2: Go to Advanced Settings-Solutions and select the solution.
Step 3: From the left pane click on Web Resources. In the Web Resources section click on New. Now window opens as shown below.

Step 4: In the content section, the Type must be set to Jscript from the dropdown. Choose the Jscript file from your storage.

Step 5: Provide information like Name, Display Name, Description in General section. Set the type, choose the language, upload the Jscript file in the Content section. And finally input the url in the URL section.

Step 6: Click on Save and then Publish.
How to deploy notification using JavaScript
Step 1: In the form go to Settings-Advanced Settings-Solution

Step 2: Select the solution and from the list of entities select the appropriate entity

Step 3: From the entity components select ‘Forms’ and the list of Forms select the appropriate form.

Step 4: Now select ‘Form Properties’ from form section in the ‘Home’ tab

Step 5: Add the already uploaded JavaScript web content to the Form in the ‘Form Libraries section

Step 6: Now in the ‘Event Handler’ section, set the Control as ‘Form’ and Event as ‘OnLoad’

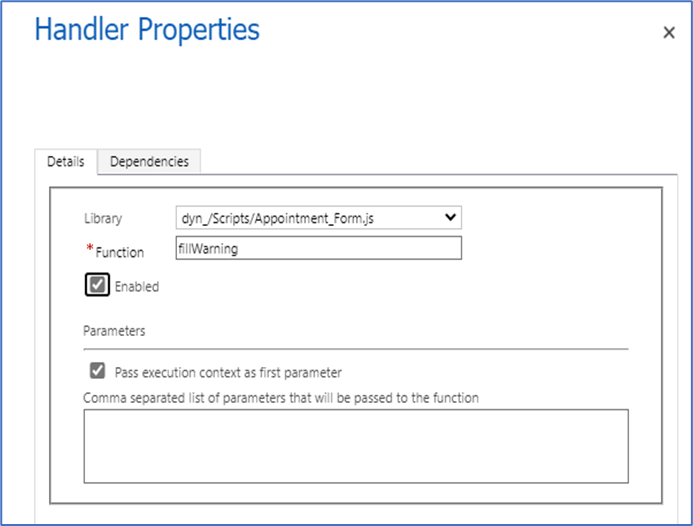
Step 7: Now click on the add icon and in the ‘Handler Properties’ window the library will be prepopulated automatically. And in the ‘Function’ tab input the Jscript function name for showing notification. Also check the ‘Pass execution context as first parameter’ box.
Step 8: Click on Save and Publish the Form.
Once the Form properties are published, go to the form and refresh the page. Now we can see that if ‘Follow up date’ or ‘Next action’ field is empty, a notification saying ‘Follow up date’ or ‘Next Action’ is Empty’ will be shown.

