

This blog takes you through the ways to clear the cache and also how to show internal error message details within Power Apps Portal. Often seeing the exact error message will be helpful in trouble shooting the issue and get it fixed.
Clear Cache in Portal to reflect latest changes
While building a power apps portal, it is necessary to instantly view all the required changes that you made on the portal. In order to achieve this, you should clear the cache on a timely basis. The Power Apps portal uses caching to enhance the portal’s overall performance.
When the cache is cleared, it helps to make sure that all the latest updates to the portal metadata and data verse are visible on the Power Apps portal.
Therefore, if you are an admin and want to clear your cache, here are the steps for it.
Steps involved in clearing cache while using the portal:
As a portal admin, the cache can be cleared on the server side for the entire portal to reflect changes in the Dynamics 365 portal in real time.
Step 1: Go to Dynamics 365 Portal Management > Contacts. Add respective web roles such as Administrator in the Portal Contact Form


Step 2: Navigate to the URL as follows: /_services/about
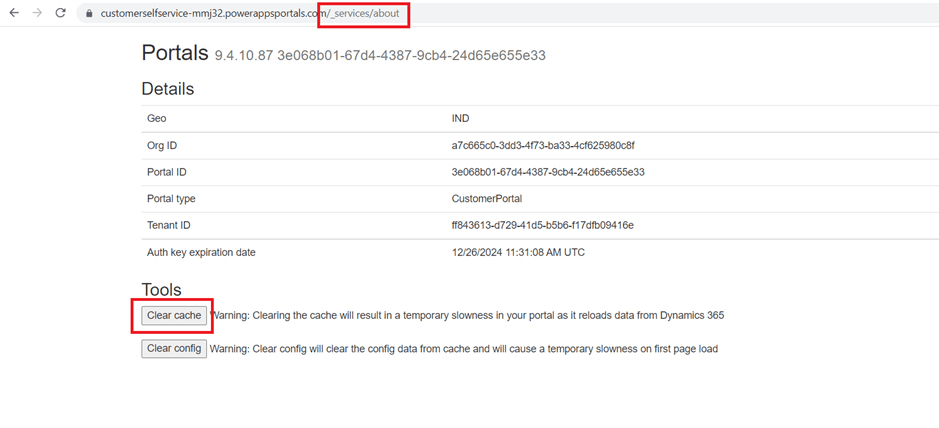
Step 3: The portal details page will be opened as depicted in Fig 3. Click on the ‘Clear Cache’ button to clear the cache.
Therefore, you can get to reflect all required changes on the D365 Portal in no time by clearing the cache as explained above. This helps you speed up the processes and increase efficiency.
Show Internal Error Details in Power Apps Portal
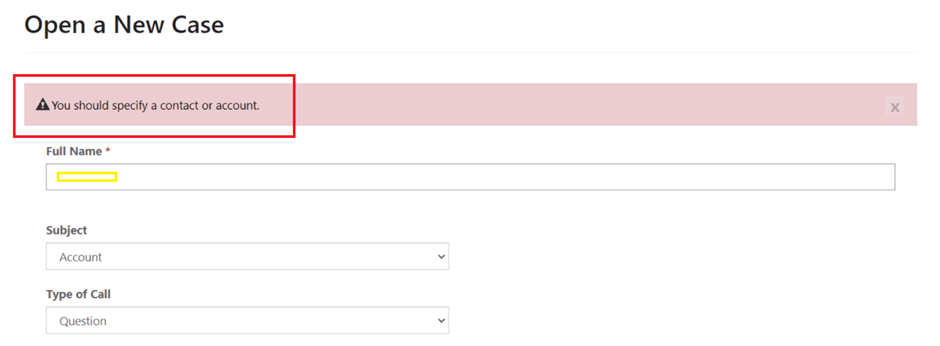
Issue: While trying to submit the ‘Create Case’ forms in this customer service portal, a custom plug-in error pops up as shown in Fig.4.

Solution: In order to sort this issue, you need to follow the steps below:
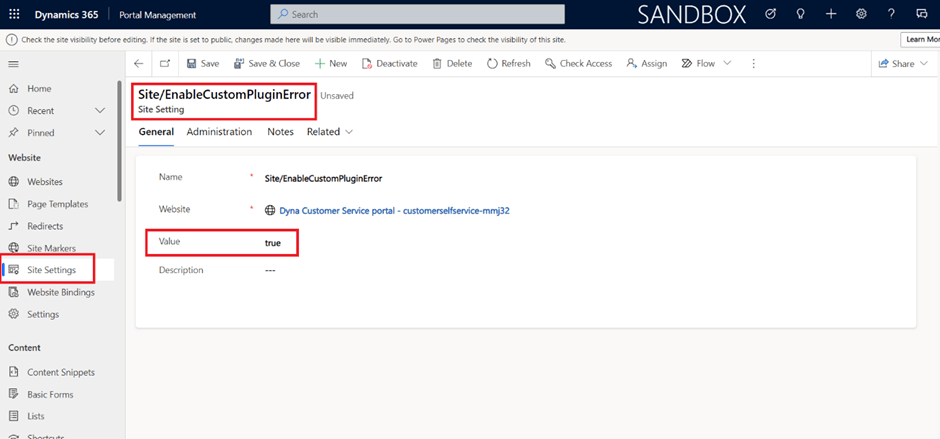
- Go to Portal Management App > Site Settings > Add a New Site Setting (if there is none) and set the value to “true” as depicted in Fig 5.
- After that, the unknown custom error will be replaced with a meaningful error message as mentioned in Fig 6 below, so that you can rectify the reason behind the cause of the error in submitting the form and fix it accordingly.
Hope it helps!
