

Storing attachment from PowerApps to SharePoint is a common requirement for many apps. To accomplish this we will use a power automate flow with power apps as the trigger. This blog walks you through , how to upload an attachment from canvas app to the corresponding folder in SharePoint document library and thereby display it in model driven app also.
Sample App Leveraging the SharePoint Server Side Synchronization For Document Management via Canvas App
Expense app is used by employees in an organization to reimburse their expenses for the organization. Each expense will have several no.of line items. For each line item there is an option to add attachment. While adding a new line item to an expense, the employee can attach files related to each line item and press update button to submit the attachment.
Step 1: Insert Attachment field in the canvas app
To insert an attachment field in canvas app , first go to the table for which you would like to add attachment. Here it is Line Item. Then enable the attachment option and save it.

Fig 1.
Inorder to add the attachment control to the canvas app you need to create an Edit Form,then you can add the attachments field using Edit Fields on the right side menu. Cut the attachments control and paste it outside the form.If you want that form you can keep it otherwise if you need only the attachment control then delete the form. In this case we already have a form(LineItemForm), so go to the LineItemForm and add attachment field from edit field.
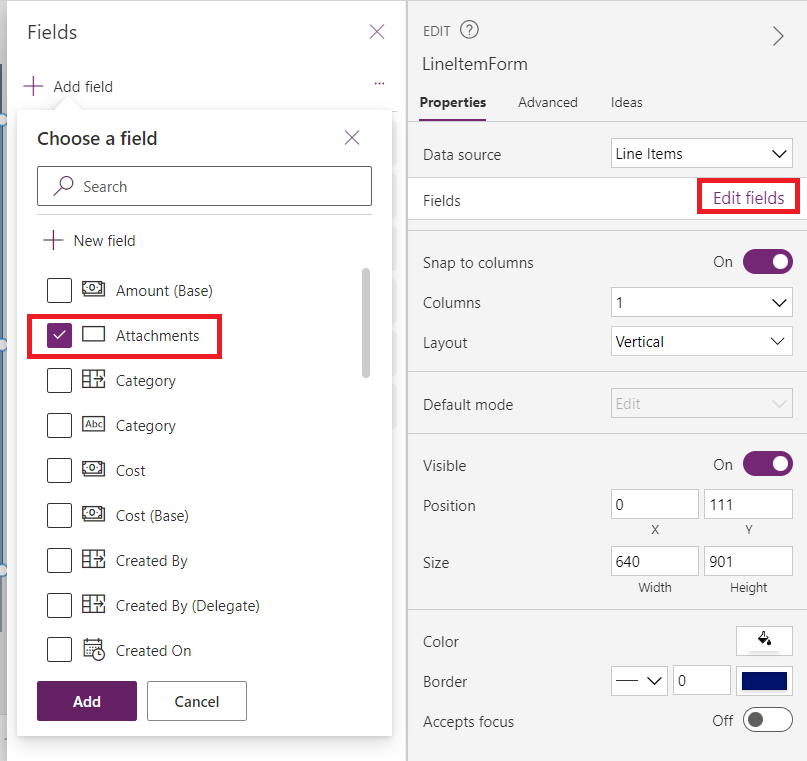
Fig 2.

Fig 3.
Now cut the attachment and paste it outside the form. If you want you can rename the attachment control(here it is renamed as Attacher2).
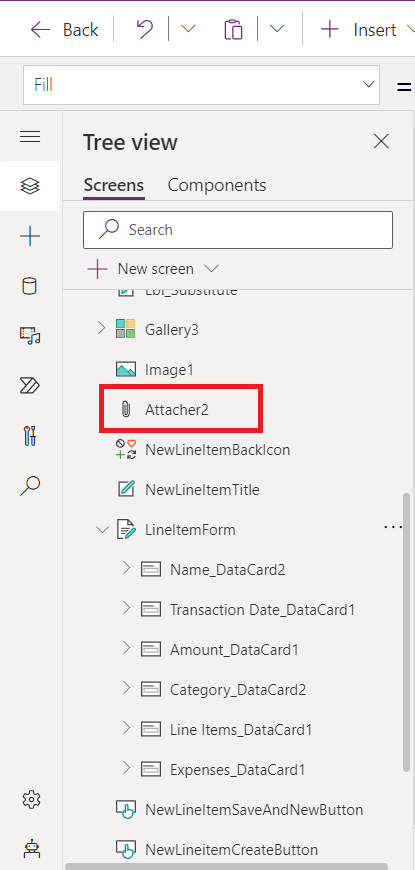
Fig 4.
The reason why we do this is, if we click on ‘Attach file’ we can select from ‘All Files’. But if we use ‘Add Picture’ control from ‘Media’ for attachment option it defaults to image files only,so we need to change it each time to select from ‘All Files’.
Then add an image media(Image1) into newlineitem screen to preview the image that we have selected using the attachment control.Update the image property of the image as follows:
Last(Attacher2.Attachments).Value → Here ‘Attacher2’ is the name of the attachment control

Fig 5.
So if we attach an image it will show in this image media(Image1) like this:
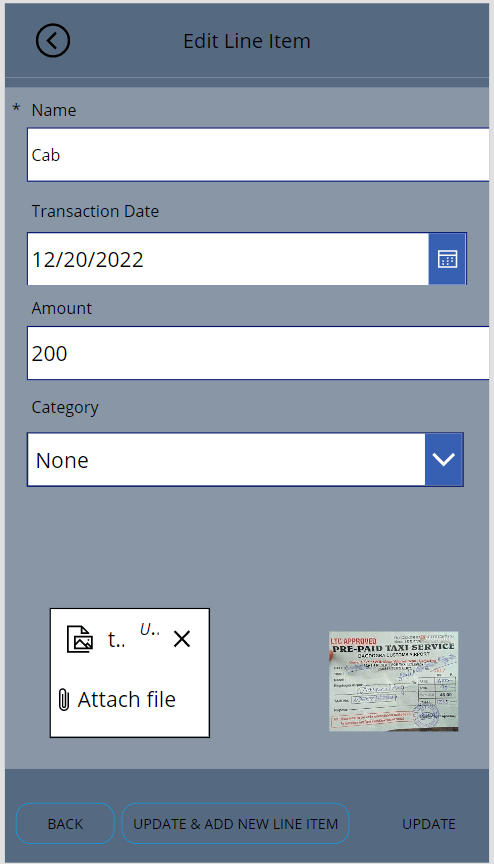
Fig 6.
Write the code for update button as follows:
Set(varDemoFromAttachmentControl, JSON(Image1.Image, JSONFormat.IncludeBinaryData));
Set(varBase64Only, Mid(varDemoFromAttachmentControl, Find(“,”,varDemoFromAttachmentControl)+1, Len(varDemoFromAttachmentControl) – Find(“,”,varDemoFromAttachmentControl) -1));
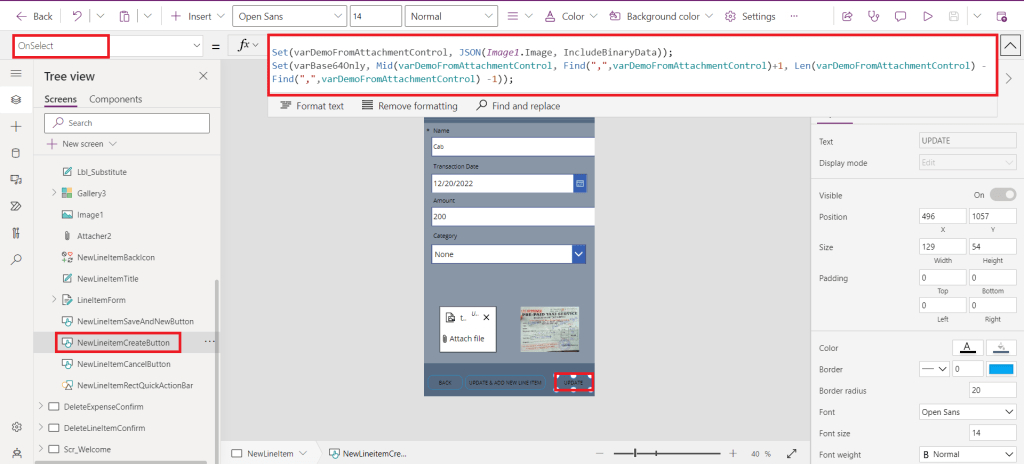
Fig 7.
Step 2: To display the uploaded file in model driven app
So for this we have to create a model driven app and link it with the entities that we need.
From powerapps go to Advanced settings.
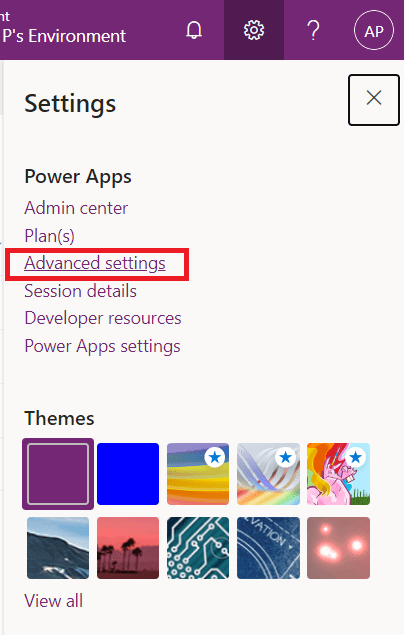
Fig 8.
From settings select Document Management.
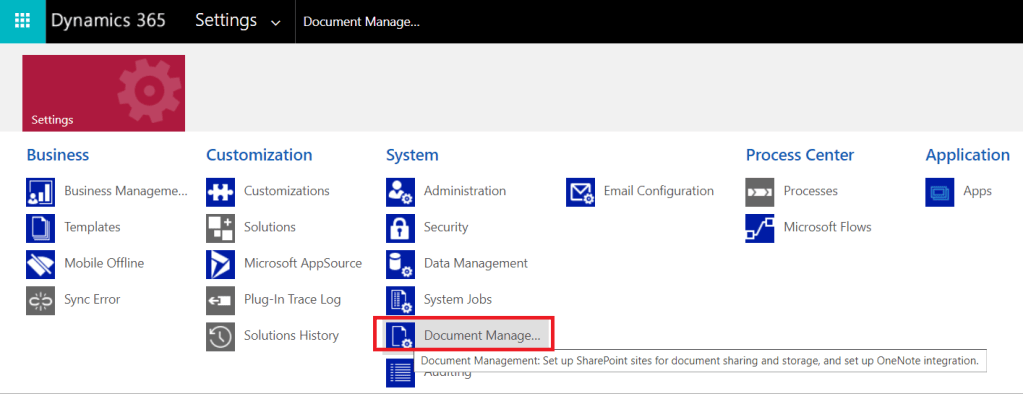
Fig 9.
In Document Management select Document Management Settings.
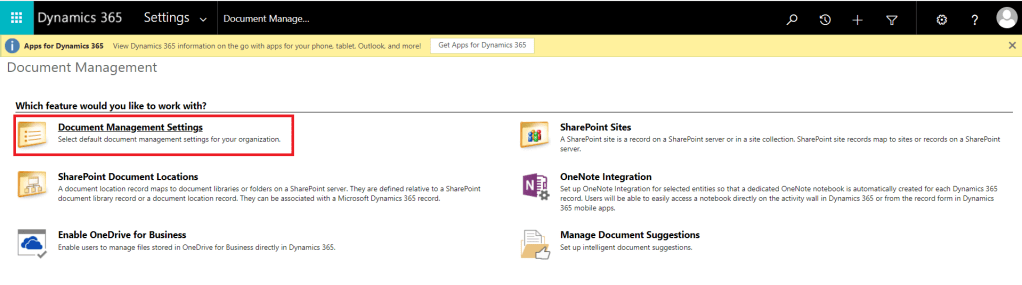
Fig 10.
Then select the entity to enable document management, in this case it is ‘Line Items’.Give the name of the entity where you have enabled the attachment option.
If a URL is not already specified, enter the URL of the SharePoint site where the document locations and folders for storing documents will be created, and then select Next.
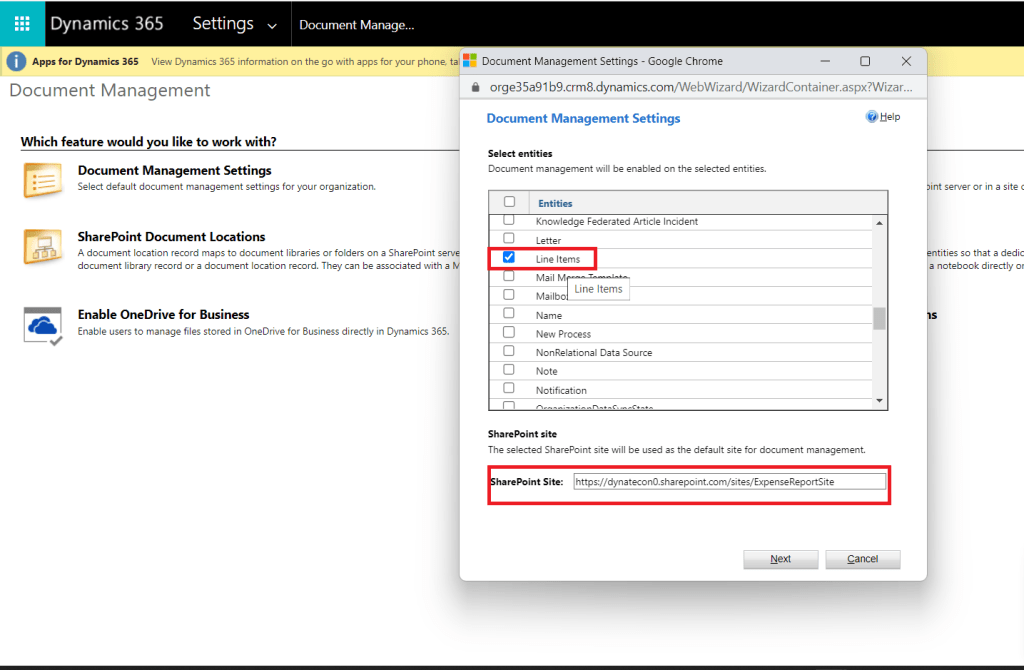
Fig 11.
Click on finish.
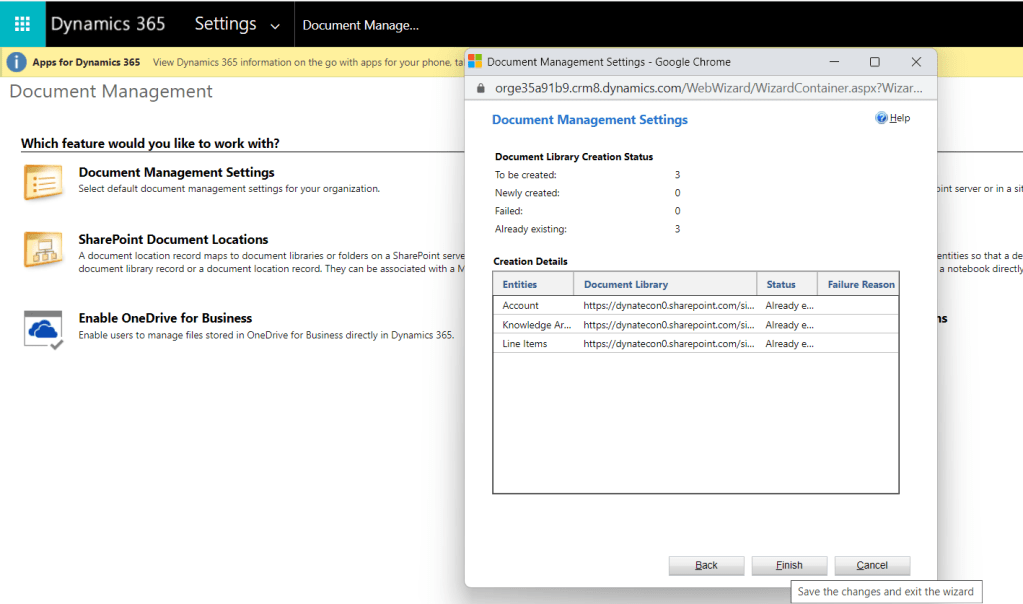
Fig 12.
This will create a sharepoint document library in the site that we have mentioned in the previous step(Fig 11).Now click on OK.
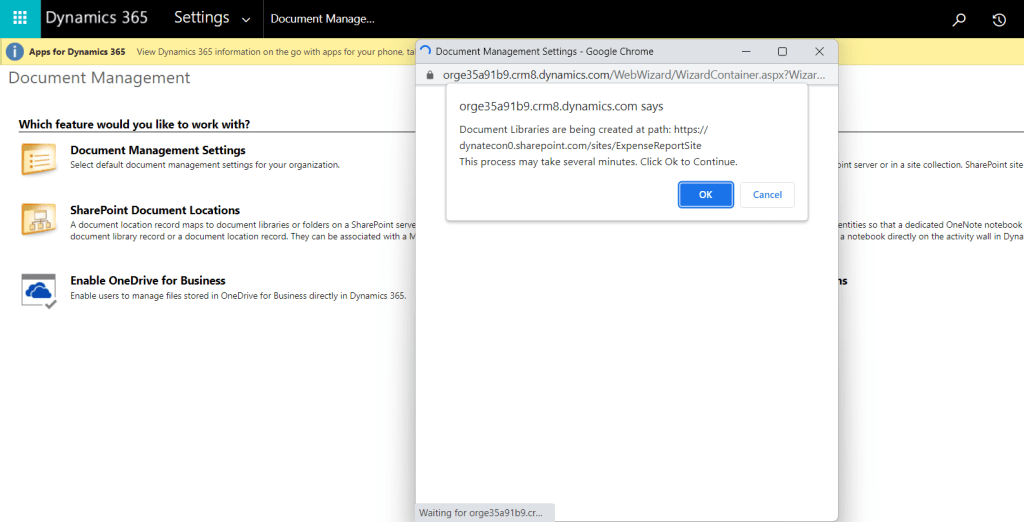
Fig 13.
Now if we go to the sharepoint site we will be able to see the library that we have created. Here it is Line Items. So while creating flow we will specify this library(Line Items) inorder to create folders and files.
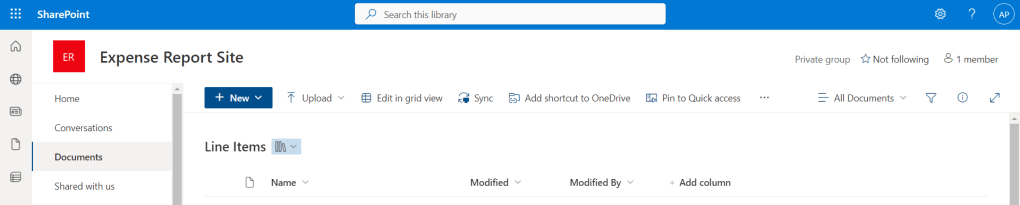
Fig 14.
After doing this, uploading any file into this sharepoint document library will be visible in the document section of model driven app.
Step 3: Write the flow
Create an instand cloud flow. Here the name of the flow is ‘Upload Image to SP’ and PowerApps is the trigger.For ‘Row ID’ open the dynamic content and click on ‘Ask PowerApps’.This will fetch the row id of the particular Line Item.
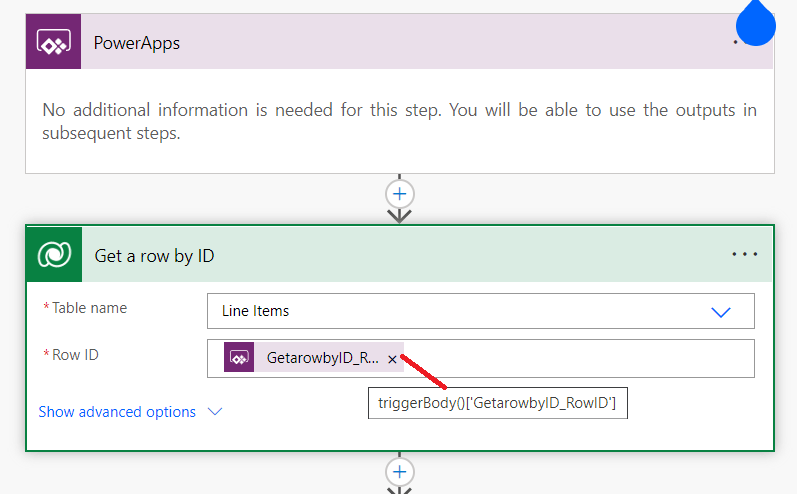
Fig 15.
Then initialize sharepoint folder variable
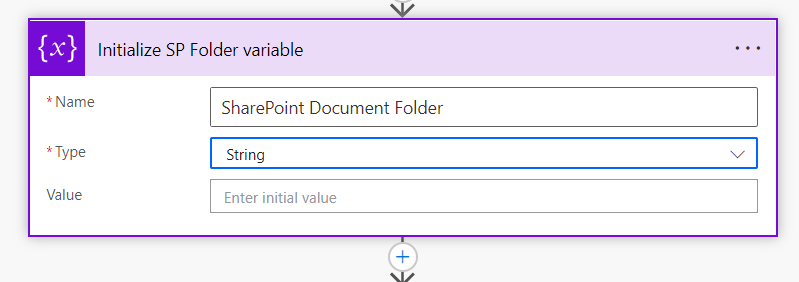
Fig 16.
Here compose will take the Line Item id. Id will be like 6a6573df-f221-ed11-9db2-000d3af2969c. So in the next step(Fig 18) it will replace ‘-‘ in the id. Then the output will be like 6a6573dff221ed119db2000d3af2969c

Fig 17
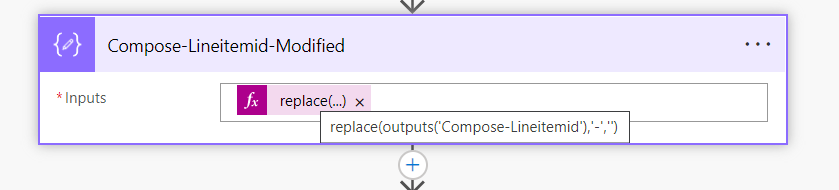
Fig 18.
This compose will capture the name of the Line Item
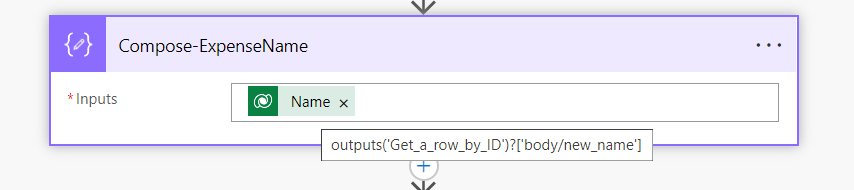
Fig 19.
Then finally this will set the name of the sharepoint document folder by concatenating the line item name with the modified line item id separated by an ‘_’
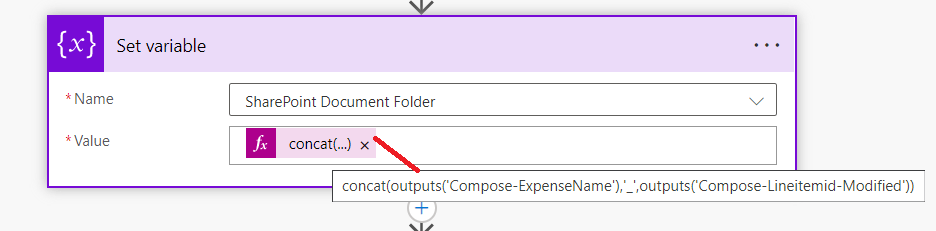
Fig 20.
This step will create a new folder inside the site that is specified in the ‘Site Address’.The sharepoint document library where we create our new folder will be the one that we have created during the document management( Fig 14 )
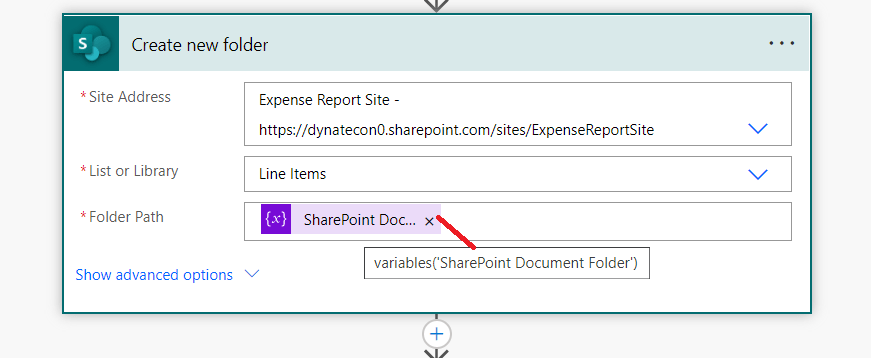
Fig 21.
Then the file will get created inside the folder that we have created in the previous step(Fig 21).For ‘File Name’ and ‘File Content’ open the dynamic content and click on ‘Ask PowerApps’. We will provide ’File Name’ and ‘File Content’ through the canvas app while running the flow.

Fig 22.
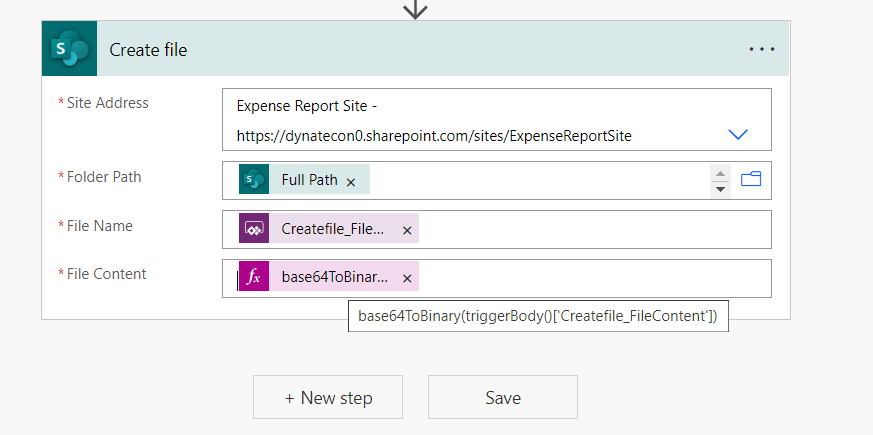
Fig 23.
Sharepoint do not store base64 files so we need to convert the ‘FileContent’(Createfile_FileContent ) which is in base64 to binary. For that open the Expression tab and select base64ToBinary() and click on Dynamic Content and select Createfile_FileContent
Complete Flow

Add flow to the canvas app and write the code to run the flow on the OnSelect property of the ‘Update’ button.
UploadImagetoSP.Run(DataCardValue7.Text,Last(Attacher2.Attachments).Name,varBase64Only);
Here DataCardValue7 is the id of Line Item(it gets created automatically when we create a table).
Last(Attacher2.Attachments).Name-is the name of the attachment

Fig 24.

Fig 25.

Fig 26.
Now go to the model driven app and navigate to the particular line item for which we have uploaded the file(here it is Cab).
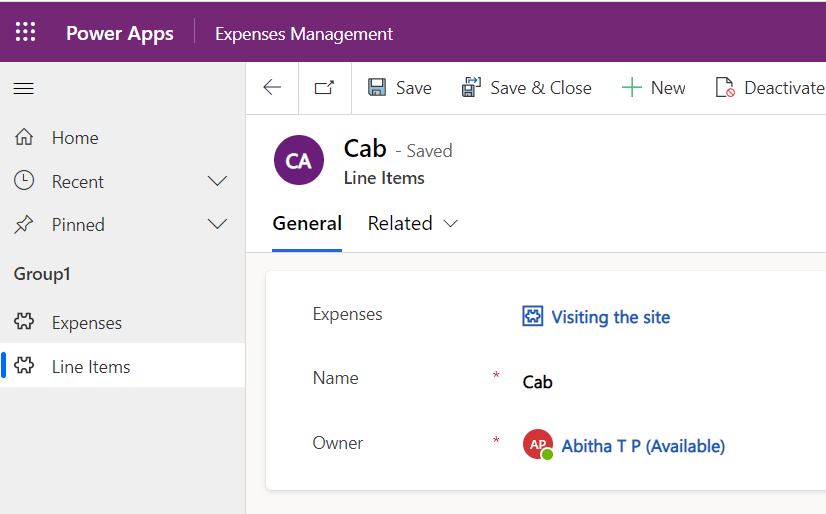
Fig 27.
Here from the Related tab select Document option.

Fig 28.
Then we can see the file that we have uploaded to the sharepoint from the canvas app(Fig 29).
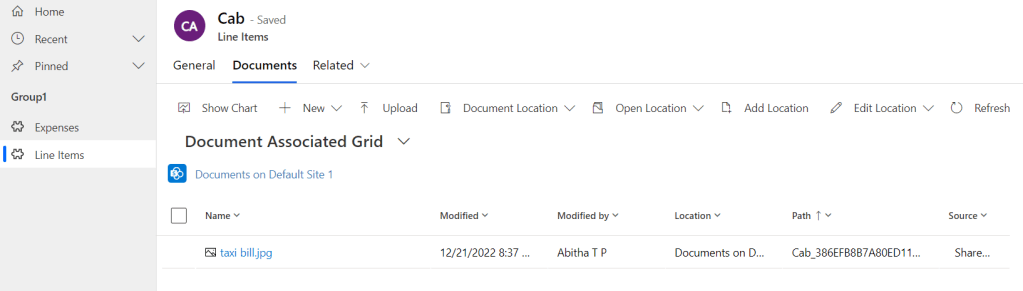
Fig 29.
Hope this helps!
