

In this blog we will see how can we add an external contact to Azure AD using power automate flow. This will create an azure AD guest user account for the user and provide an invitation email with a url to access the APP.
Use Case: You are building a Power App, and need to provide access to people outside your organization to the App. You also need to have a public page in which external contacts can submit request to access your app. Also, an approval process where only relevant requests to be approved by the Admin.
Below are the components list for this process:
- PowerApps portal page for contacts to submit the request / Microsoft Forms can also be considered for this which can be used to capture the request details.
- Power Automate flow for approval process
- Power Automate flow for inviting contact to Azure AD.
1. PowerApps portal page for contacts to submit the request.
Here we have a powerapps portal page to capture the email, firstname and lastname of the user. When the user enters and submit all these informations this will get captured in a dataverse table.
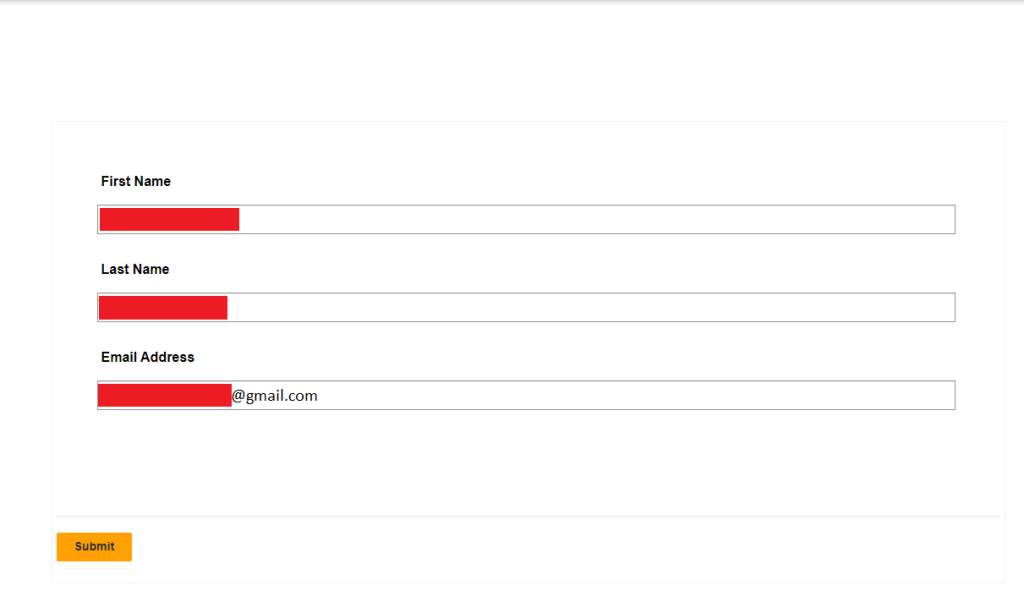
Fig 1.
2. Power Automate flow for approval process.
The status of the record will be ‘initiated’ by default. This power automate flow will change the status from ‘initiated’ to ‘approved’ based on some conditions. The power automate flow for inviting contact to Azure AD will run once the status is changed to ‘approved’, which is the trigger of this flow.
3. Power Automate flow for inviting contact to Azure AD.
Create an automated cloud flow. Here when a row is modified is the trigger. ie when the value of the approval status is equal to 2 or ‘approved’ the flow will trigger. Access Requests is the table that stores the registration information that is submitted through the portal(Fig 1) which is mentioned above.
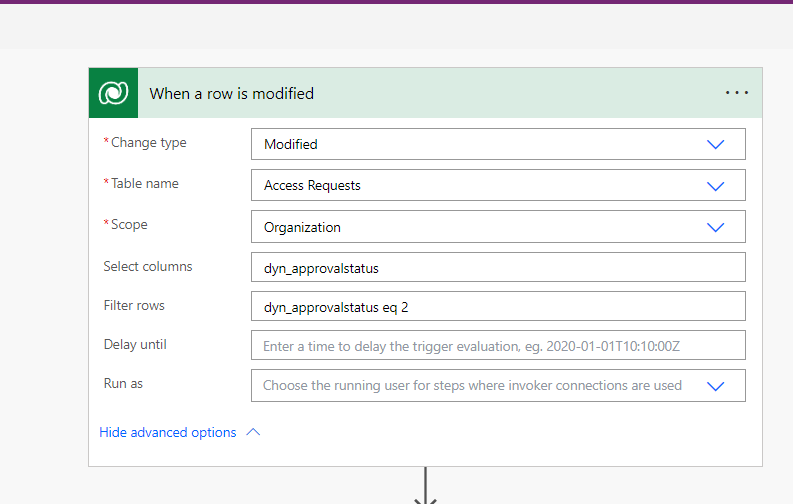
Fig 2.
Then the flow will check whether the user already exists or not using the email address.
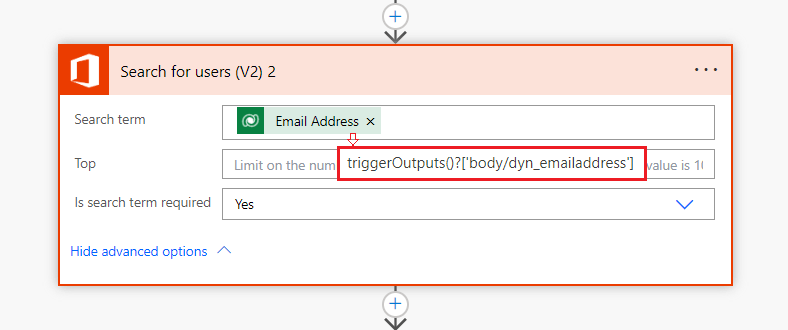
Fig 3.
If the user already exists the length won’t be equal to zero and the condition will become false. If the length of the email is equal to zero it means that user doesn’t exist and the condition will become true.
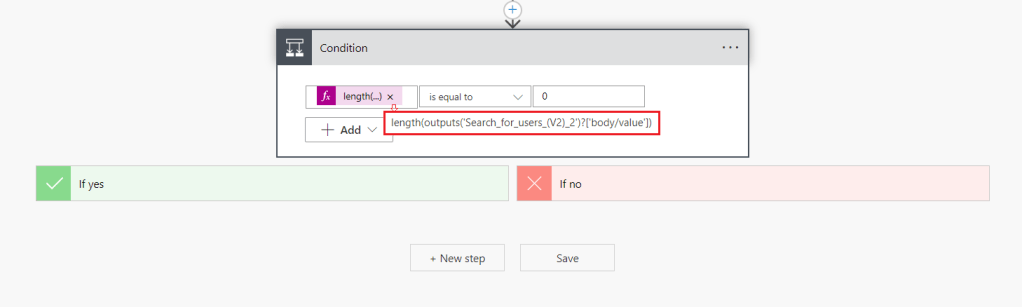
Fig 4.
Then we use graph API and post information to graph API. This will provide us with functions like inviting users. Inorder to connect our application to graph API we have to provide the tenant id, application/client id and secret. To get the secret value, from azure portal go to certificates & secrets and add new client secret and copy the value not the secret ID and paste it in the flow. Then set api permissions in Azure AD.


Fig 5.
These are the API permissions that needs to be set in the Azure AD portal.

Fig 6.

Fig 7.
Complete Flow
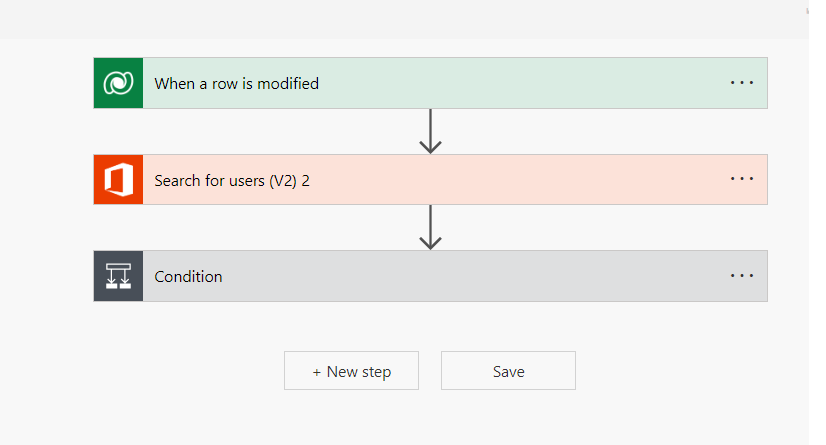
Fig 8.
After the successfull execution of the flow the guest user will get added to the Azure AD and will send an invitation email to the user with a url.

Fig 9.
When the user clicks on the url in the invitation mail it will direct the user to this page where user can access the APP.
Fig 10.
