

Efficient workflows are essential for maximizing productivity and ensuring seamless operations in SharePoint. By automating and streamlining processes the organizations can save time, reduce manual efforts, and improve collaboration. In this we will explore the combined power of Power Apps Custom Pages and Power Automate using Response Connector to streamline workflows in SharePoint
Power Apps Custom Pages is a powerful tool that allows users to design and create custom pages tailored to their specific requirements. The features and capabilities of Power Apps Custom Pages are vast such as users can add various controls such as buttons, input fields, Text fields, Media, Icons, Charts, Shapes, galleries, attachments etc.to create dynamic and interactive interfaces and it support data integration, enabling the display and manipulation of SharePoint data within the custom pages.
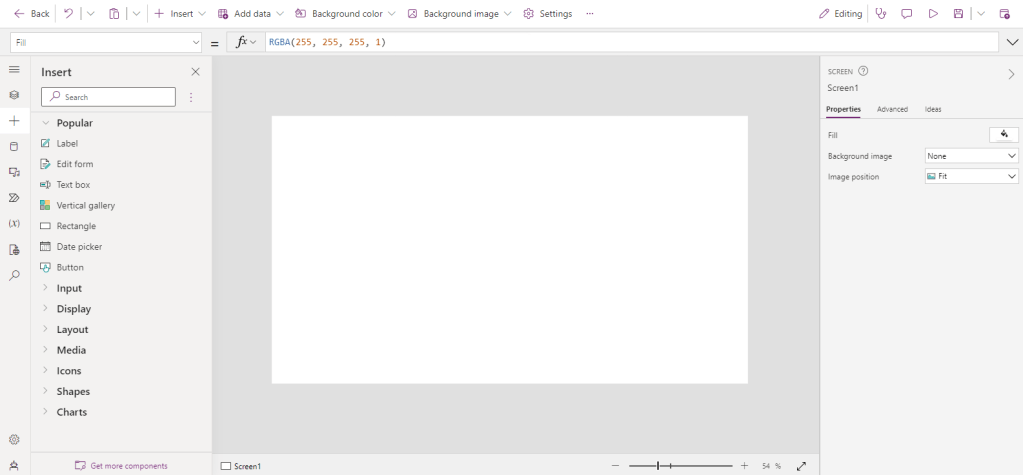
Fig 1. Face of a custom page
HTTP request connectors serve as a bridge between Power Apps and other external applications or services. By utilizing this connector, organizations can connect SharePoint with various external systems, automate data exchange, trigger actions based on specific flows, creating intuitive forms for data entry, designing visually appealing dashboards for data visualization, and developing interactive interfaces for approval processes as well. This level of integration eliminates manual efforts, reduces errors, and promotes collaboration, resulting in streamlined workflows and enhanced productivity.
REQUIREMENT:
In this case our requirement is which the power app is having a custom page, the custom page should connect to SharePoint site. One who have the access to app and SharePoint site must be able to upload the documents in the custom page and who is not having the access to SharePoint won’t be able to access the site and they must contact the Administrator for the access.
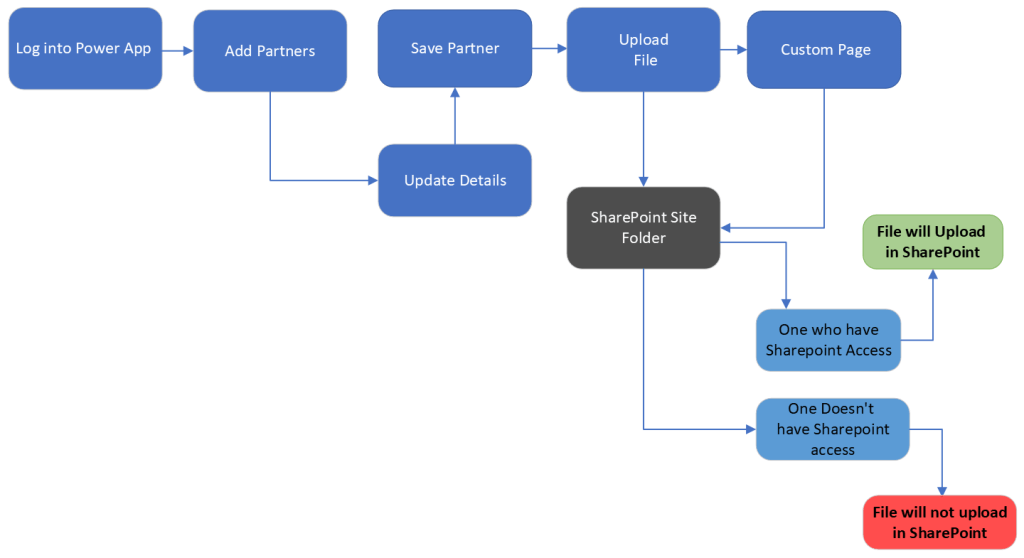
Fig 2. Flowchart
SOLUTION:
Step 1: We have introduced a power automate flow for uploading the documents with different variables.

Fig 3. workflow Illustration
Step 2: In the try step we have introduced several steps according to different entities and at the end we added the HTTP request connector. (Response PREMIUM)

Fig 4
Step 3: In this Step we have added the note in the ‘Body ‘which we want to display in the custom page. (fig4.)
Step 4: If the try fails, in order to avoid the error, we have added the Catch, and in the catch also we have added the HTTP request connector. (Response PREMIUM) step and added the note in the ‘Body’ as per the requirement.
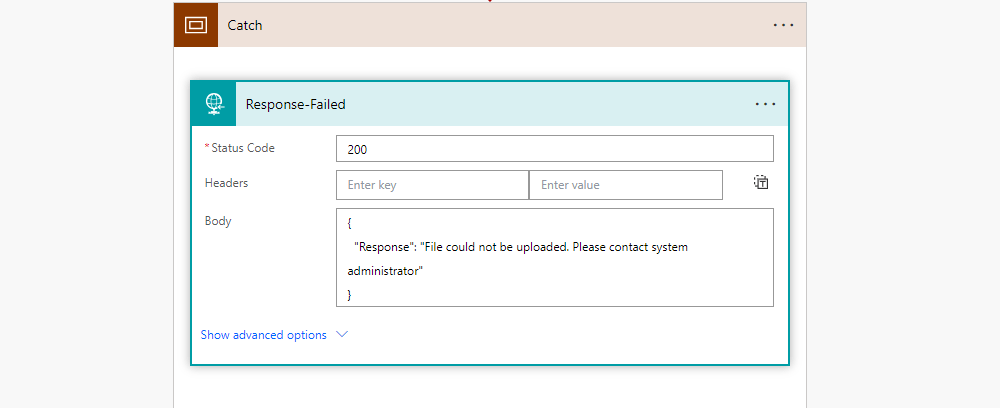
Fig 5
Step 5: Then We have to introduce the custom page in the Power app.
The steps involving in the creation of Custom page is mentioned below.
- Open power App and navigate to the desired app.
- Click on the desired Solution.
- Click on “Pages” in the navigation pane.
- Select “New Page” and choose the layout that suits your needs.
- Customize the page by adding controls, such as buttons, input fields, and galleries, to create an interactive interface.
- Personalize the page’s appearance by adding branding elements and adjusting the layout. (Fig1.Front face of custom page)
Fig 6
Step 6: All the elements are added in the custom page according to our requirements. In the custom page we have added 3 different ‘Buttons‘, (Success Button, Ok Button, Upload Button)’,DataCardValue‘ for the attachment.

Fig 7
Step 7: In the Properties we have assigned a new variable ‘Varvis’ for the visibility for the buttons and we have added the property for the ‘Success Button’ and ‘Ok Button’ after applying this interface will look like this. (Fig8)

Fig 8
Step 8: We have added some Fx formula in the Onselect property of the Upload button for obtaining the desired output.

Fig 9
Step 9: Finally, we have set the color of the response text according to the response, for that we have add a Fx formula in the Text Color property of the ‘Success Button‘.
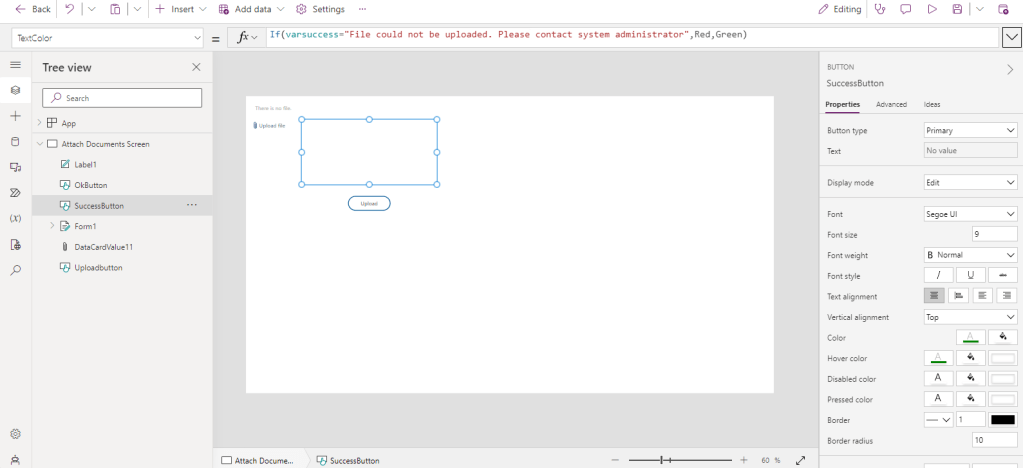
Fig 10
Step 10: Save and Publish.
OUTPUT:
SCENARIO 1:
One Who is having the SharePoint access they can upload the file.
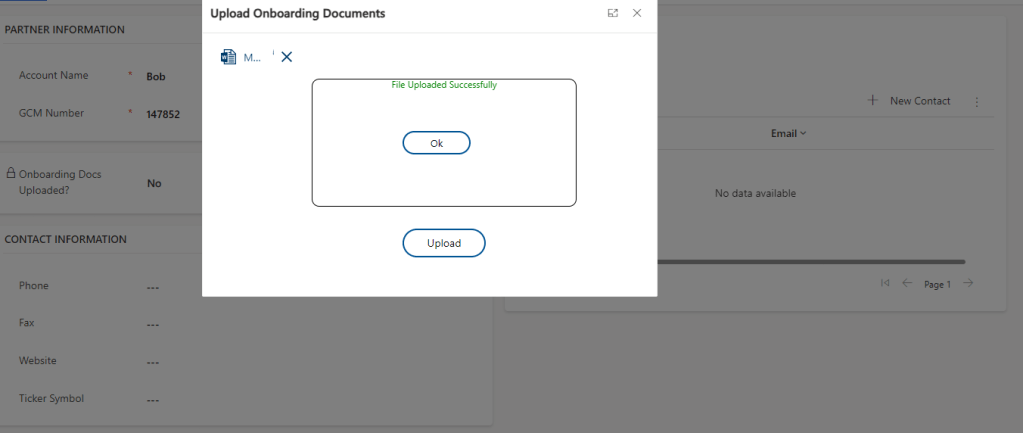
Fig 11
SCENARIO 2:
One who is not having the SharePoint access they can’t upload the file.

Fig 12
Hope this was useful!
