What is Test Studio
You can test inside of canvas apps with the built-in tool called Power App Test Studio. This tool can help you write, organize, and automate your tests for canvas apps.
How to Work with Test Studio
Open Test Studio
- Sign into Power Apps
- Create a new app or edit an existing app
- Save your app
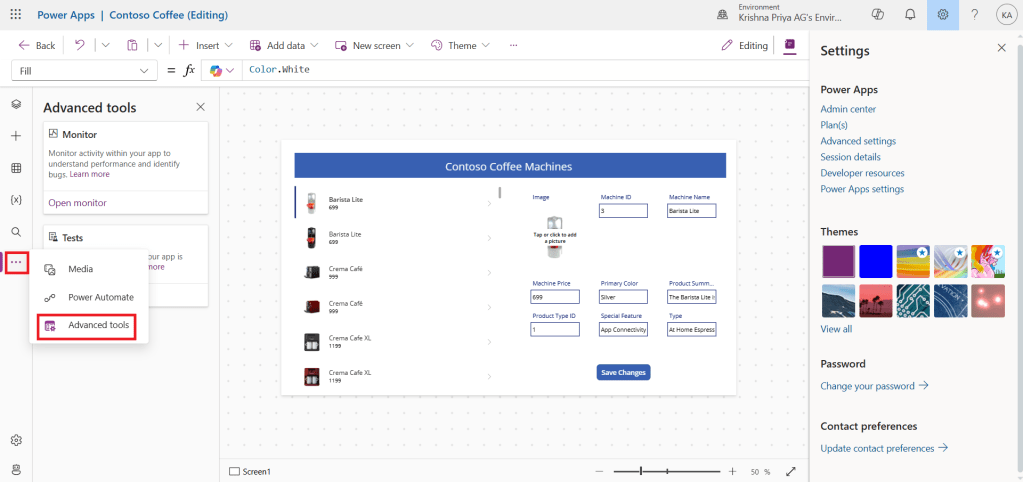
- Select Advanced tools in the left navigation
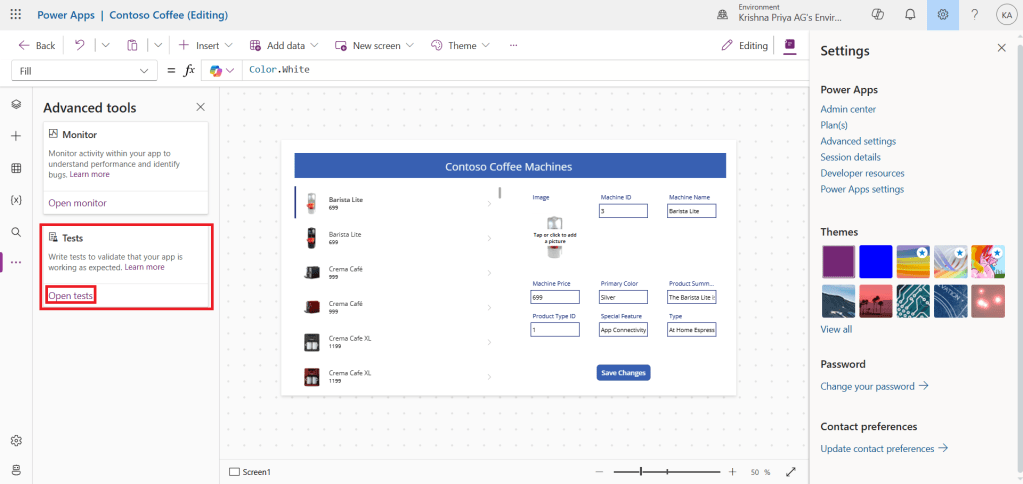
5. Select Open tests to open the Test Studio for this application. This action opens Test Studio in a new browser tab.
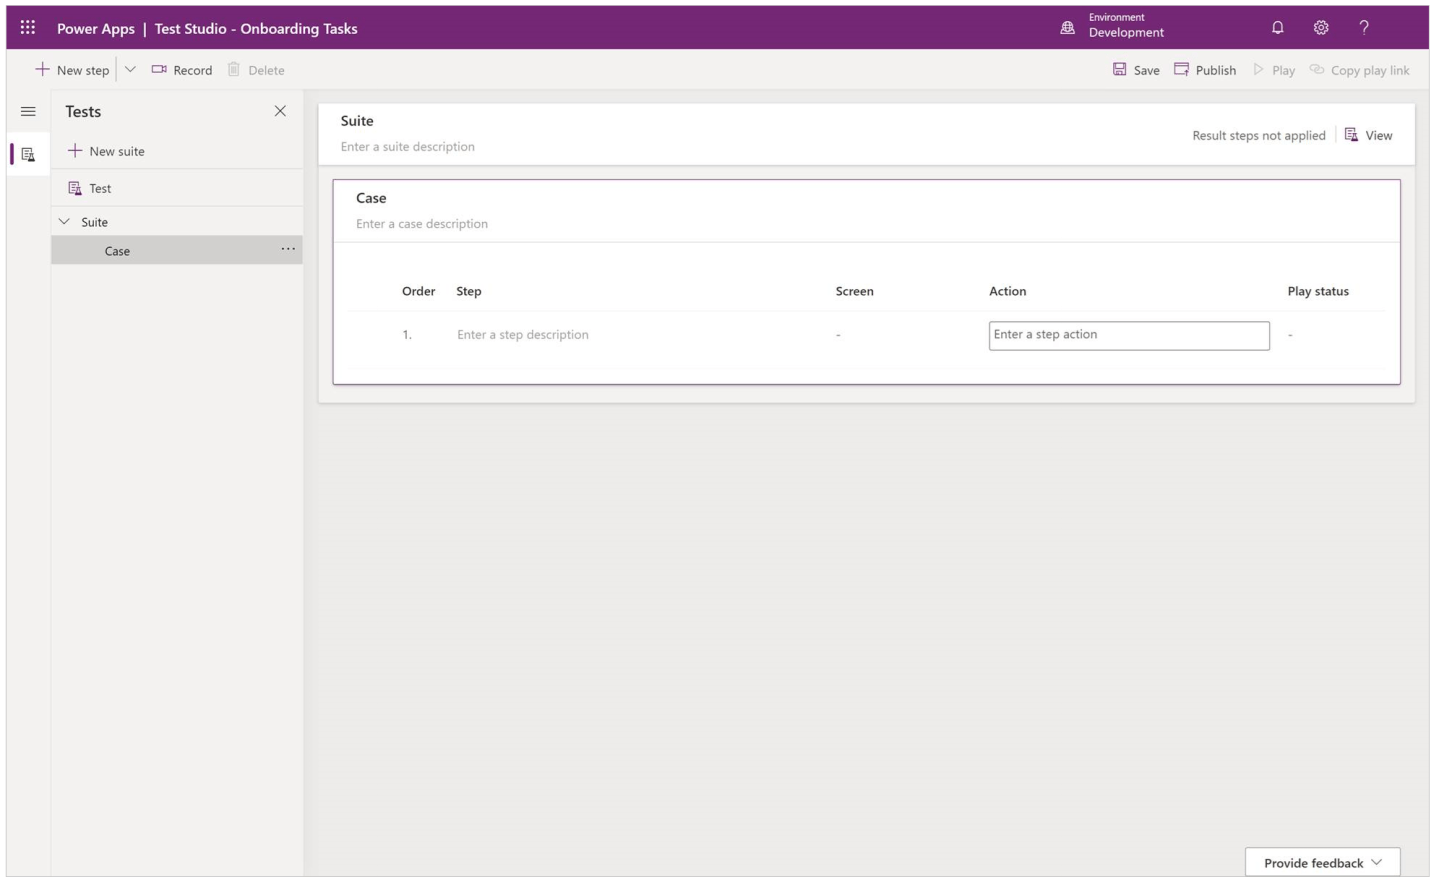
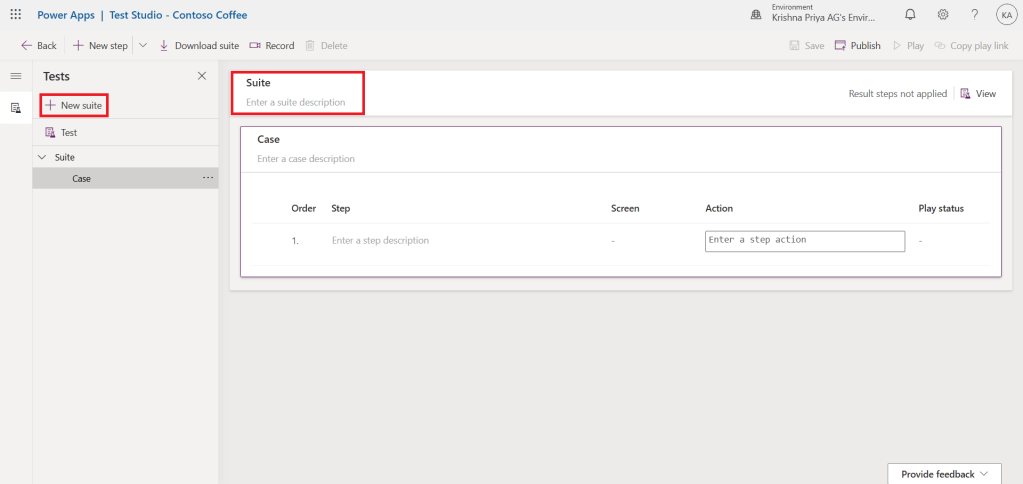
Create a Test Suite
By default, a test suite and test case are created for you in Test Studio. Test suites are used to organize your test cases. An app can contain one or more test suites. You can use the default test suite and case or create a new test suite.
- Select New suite.
- Update the Test suite name and description by selecting the fields on the main grid.
Create a Test Case
Depending on how you want to organize or group your tests, you can create multiple test cases in a test suite. Each case can test a specific feature or a subset of functionalities in your app.
- Select a test suite.
- Select New Case in the top menu to create a new case.
- Update the Test case name and description by selecting the fields on the main grid.
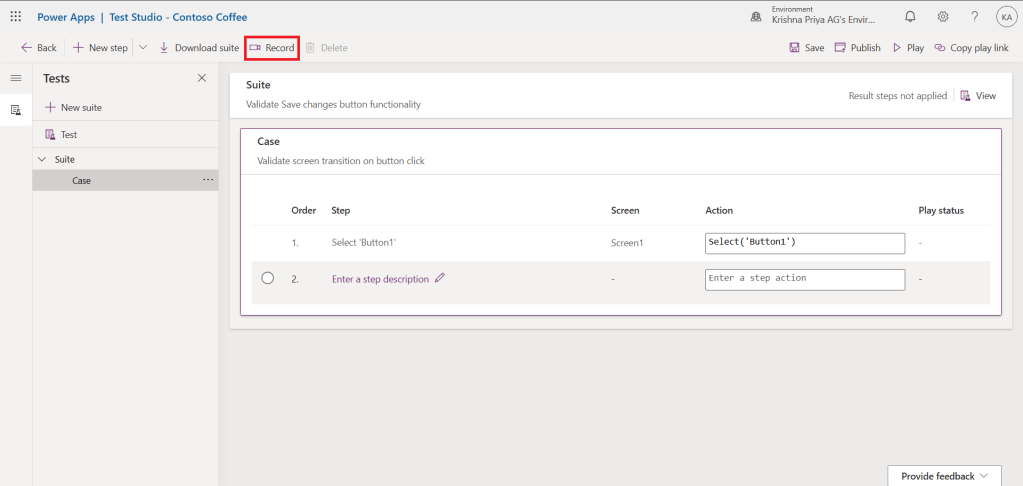
Record a Test Case
You can use the recorder to automatically generate the test steps as you interact with your app. After you record, you can update the test case, add new steps, delete steps, and write test assertions to validate the result of your test.
1.Select Record from the top menu. This action opens the published app with recording mode in a new browser tab.
2.Interact with your app. Your actions are recorded in the left pane.

3.Once interaction completes, select Done. Optionally, you can select Cancel to return to Test Studio without your interactions getting recorded.

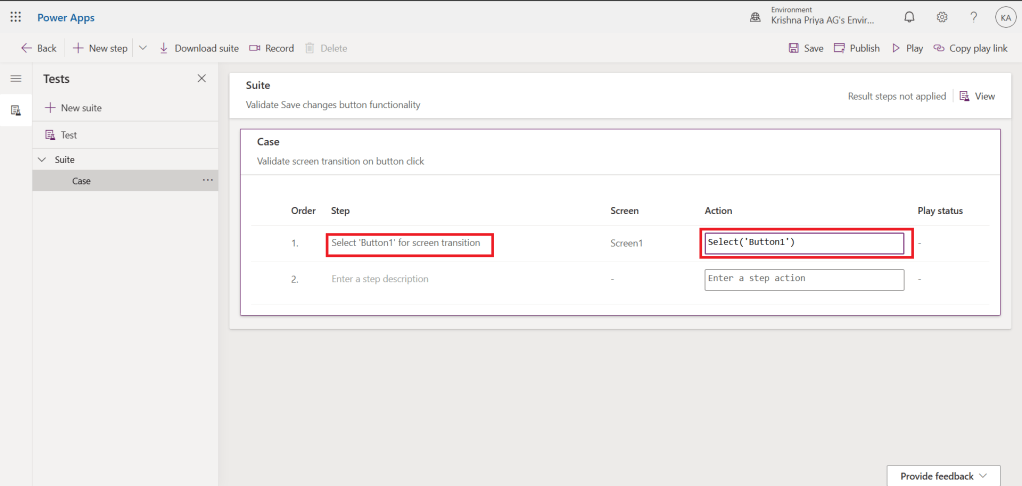
4.View the test steps and the expressions that were automatically generated for you in Test Studio.

5.Edit the step description text in the main grid if necessary. You can also update the test step actions by selecting the formula on the main grid.
Play Back your test
You can play back your recorded test to validate app functionality. You can play back all tests within a single test suite, or a single test case.
Before you play the recording back with recent changes, you must publish the app:
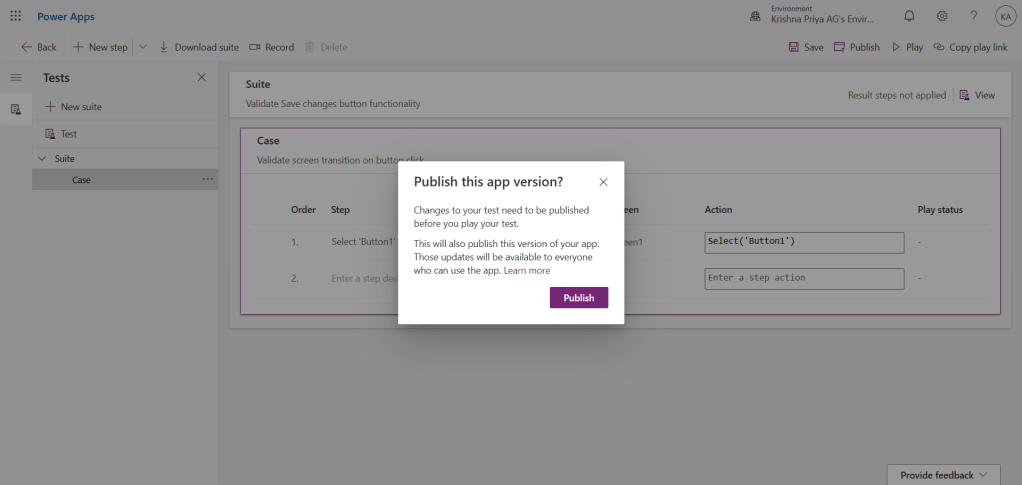
Select Publish to automatically save and publish your test.
Select either a test suite or a single test case.
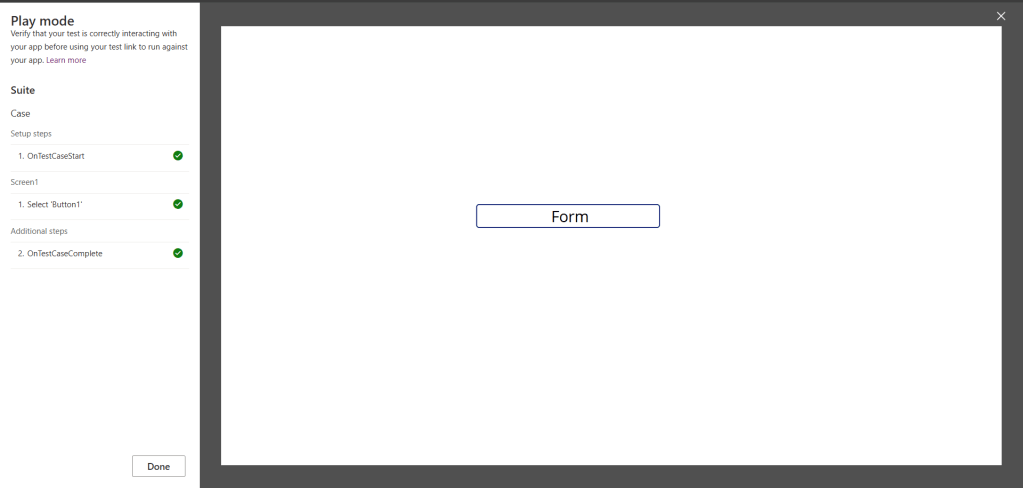
Select Play. The published app opens in Play mode, and you can see your test steps playing back automatically. A green check mark indicates when a test step is executed successfully. If a step fails, a red failure indicator along with a failure message is displayed.
Select Done to return to Test Studio.
Setup your tests
The OnTestCaseStart property of a Test Suite can be used to setup your test. The expression entered for this property triggers for every test case in a suite before the case begins executing. OnTestCaseStart helps you avoid writing the same test steps at the beginning of every case. You can customize this property to run set up tasks that are common to all cases in the suite such as:
- Always starting test execution from the first screen.
- Initializing common collections or variables.
- Fetching test data from a data source for the current executing test
The TestCaseInfo record contains details for the current test that is executing. It contains the following properties:
- TestCaseName – the name of the test case.
- TestCaseDescription – the description of the test case.
- TestCaseId – the ID of the test case.
- TestSuiteName – the test suite name that the case belongs to.
- TestSuiteDescription – the description of the test suite.
- TestSuiteId – the test suite ID that the case belongs to.
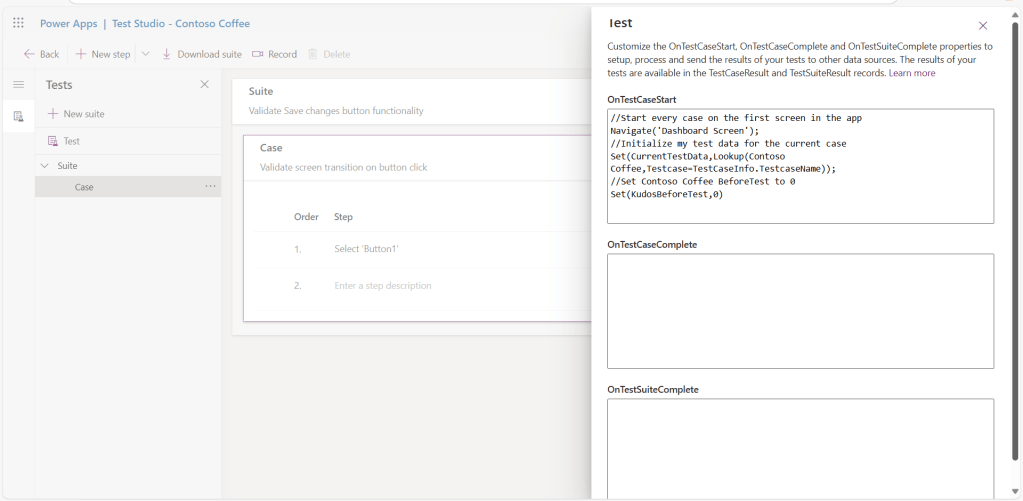
In the below example, you’ll customize the OnTestCaseStart property so every test case begins from the first screen in your app. You’ll also fetch the test data from a data source that can be referenced in the steps for the test case.
- Select Test in the left pane

2.Select the OnTestCaseStart action.
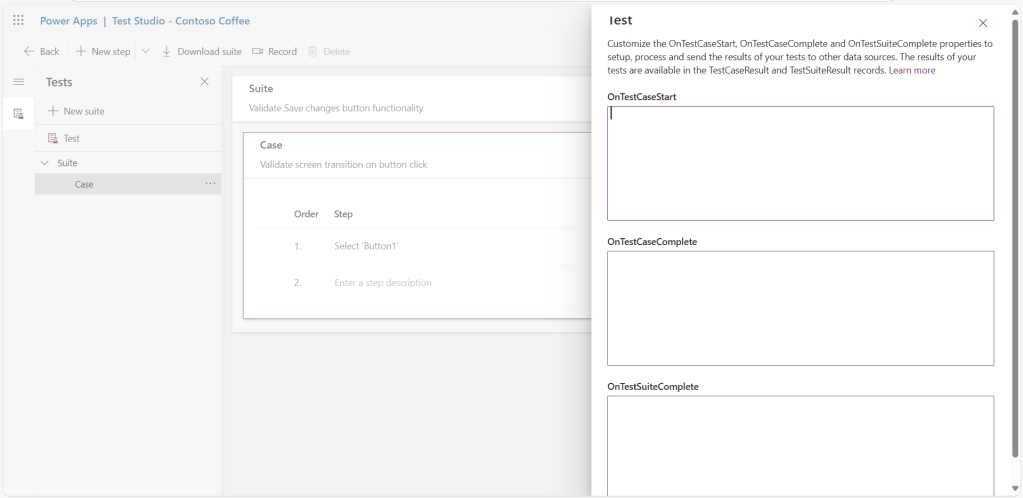
3.Input an expression to Navigate to first screen and fetch the test data for your test.
Processing test results
The test panel visible when playing back tests in Test Studio isn’t visible when using a browser. Because of this behavior, you can’t determine the specific test step that executes, or if a test passes or fails.
To determine test results outside of Test Studio, there are two properties called OnTestCaseComplete and OnTestSuiteComplete available in the test object that you can use to process the results of your tests. When integrating tests into a continuous build and release pipeline like Azure DevOps, these properties can be used to determine if you should proceed with the app deployment.
The expression entered for these properties triggers when each case or suite completes. You can customize these properties to process and send the results of your tests to various data sources or services such as:
- SQL Server.
- Dataverse.
- Power Automate.
- Email using Office 365.
These settings apply to every test suite or test case in your app. After each test suite or test case completes, the test results and any trace messages contained in the tests are available in the TestCaseResult and TestSuiteResult records.
The TestCaseResult record contains the following properties:
- TestCaseName – the name of the test case.
- TestCaseDescription – the description of the test case.
- TestCaseId – the ID of the test case.
- TestSuiteName – the test suite name that the case belongs to.
- TestSuiteDescription – the description of the test suite.
- TestSuiteId – the test suite ID that the case belongs to.
- StartTime – the start execution time of the test.
- EndTime – the end execution time of the test.
- Traces – the result of any test assertions and any messages from the Trace function.
- Success – indicates if the test case completed successfully.
- TestFailureMessage – if the case failed, the failure message.
The TestSuiteResult record contains the following properties:
- TestSuiteName – the test suite name.
- TestSuiteDescription – the description of the test suite.
- TestSuiteId – the test suite ID.
- StartTime – the start execution time of the test suite.
- EndTime – the end execution time of the test suite.
- TestsPassed – the number of test cases that completed successfully in the suite.
- TestsFailed – the number of test cases that failed in the suite.
In this quickstart, you’ll create two custom tables in the Dataverse database to store the test results by customizing the OnTestCaseComplete and OnTestSuiteComplete properties:
- Select Test in the left pane
2.Select the OnTestCaseComplete action.
3.Input an expression to process the results of your test. The following sample saves each test case’s results to the custom AppTestResults table in Dataverse. The test results can optionally be stored to SQL, SharePoint, or any other data source. You might need to set or increase the Trace field in your data source as required.

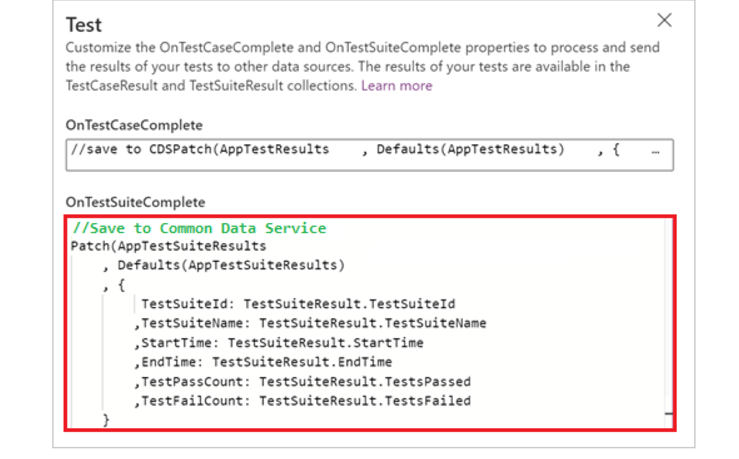
4.Select the OnTestSuiteComplete action.
5.Input an expression to process the results of your test. In the following sample, you’ll save each test suite’s results to the custom App TestSuiteResults table in Dataverse.