
In this blog we will see how to upload files directly from powerapps to sharepoint without using any power automate flow. Here we will make use of Graph API.
First we will create a sharepoint document library. For that go to the sharepoint site to which you want to create the library. And then click on ‘New’ and select ‘Document library ‘option.

Fig.1
Give a name for the library and then click on Create button.

Fig.2
Now document library will get created.

Fig.3
After creating the library go to the powerapps and create app from Blank app.

Fig.4
This will create a blank canvas app with single screen.

Fig.5
Now we need to add a control to upload files. But there is no control in powerapps to upload file. So inorder to do that add a connection to sharepoint.
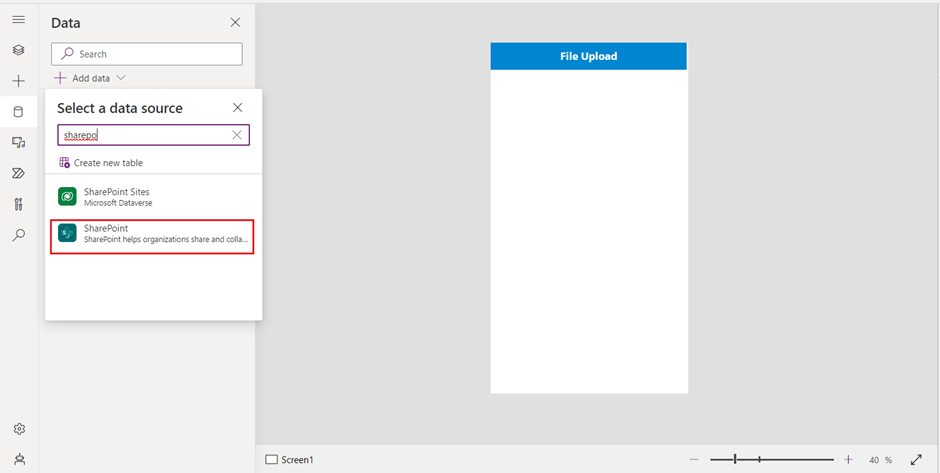
Fig.6
And select a sharepoint site.

Fig.7
From the sharepoint site select any list(only list will have attachment option) and click on Connect.

Fig.8
This will connect our app with the sharepoint list.

Fig.9
Add a new blank screen to the app.

Fig.10
Into that blank screen insert an Edit Form control.

Fig.11
And connect the form with the sharepoint list.

Fig.12
Now this will list out the columns for that specific list. Now if the list have attachment enabled it will show the attachment datacard in the form. Copy the attachment control from the form field and paste it into Screen1.

Fig.13
This will create lot of errors for this attachment control ,so remove it one by one.

Fig.14
After that we don’t need this form anymore, so delete Screen2.

Fig.15
Then delete the reference to sharepoint list also.

Fig.16
And rename the attachment control. Here it is renamed as ‘FileAttacher’.

Fig.17
Normally we will use power automate flow to upload files from powerapps to sharepoint document library. But here we will use another approach using Graph API. So click on this link.
https://learn.microsoft.com/en-us/graph/graph-explorer/graph-explorer-overview
And the link will reach out to this page, from here click on Graph Explorer.

Fig.18
This will open the Graph Explorer tool. We can find some sample queries here so that we can try with that.

Fig.19
In the graph API we have an option to upload file. For that we need some permission that are needed to make this API call, all of these are listed in the below link.
Now go to graph explorer and type ‘sites’ this will list out ‘Sharepoint Sites’. From there select ‘get sharepoint site based on relative path of the site’. This will require host name and server relative path.

Fig.20
Go to sharepoint site and copy the host name and server relative path

Fig.21
And paste it in the appropriate place.This will get the ID of the sharepoint site. Copy the site ID and paste it in the notepad.

Fig.22
Next we need the Drive ID. That is, the id of the sharepoint document library. To get this select ‘enumerate the document libraries under the root site’ option and replace root with site ID (Fig.22) and run the query.
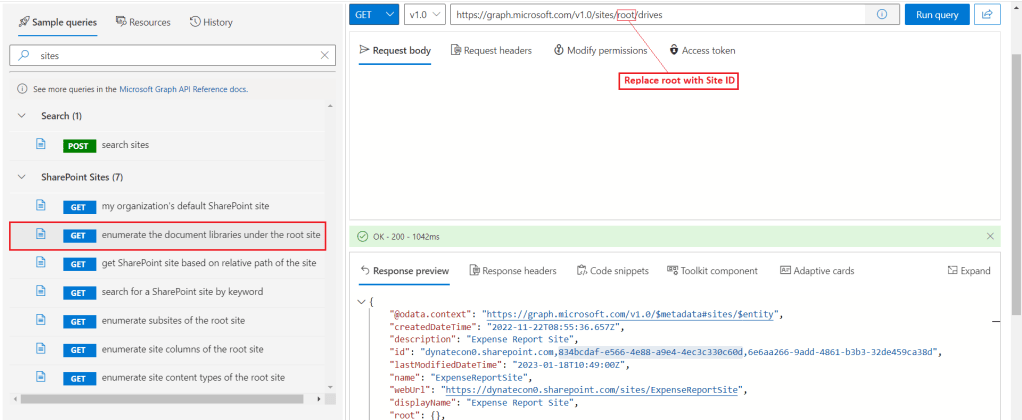
Fig.23
This will list out all the lists and sharepoint document libraries in this site. From there find our sharepoint document library(Sample Doc Lib),and copy the drive id.
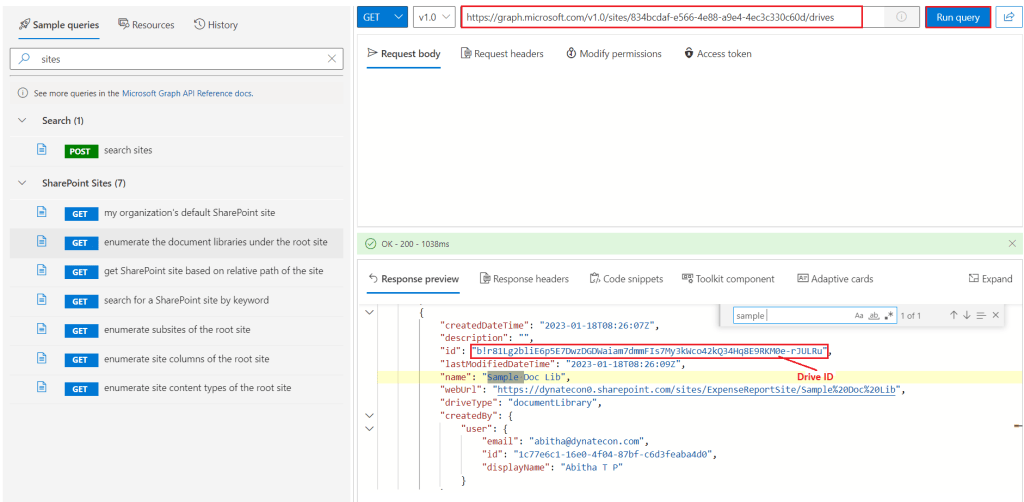
Fig.24
Paste the drive ID just after ‘drives’ and run the query. Now we will be inside our sharepoint document library.
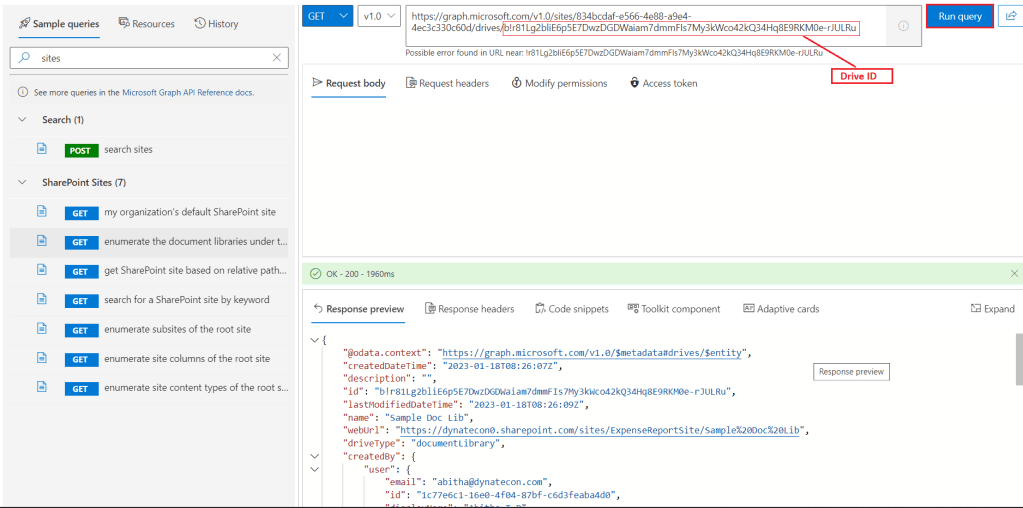
Fig.25
To upload the file we need to specify the level at which the file need to be uploaded in the sharepoint site. So here we will type ‘root’.

Fig.26
Now go back to the powerapps and insert a button so that we can upload the file.
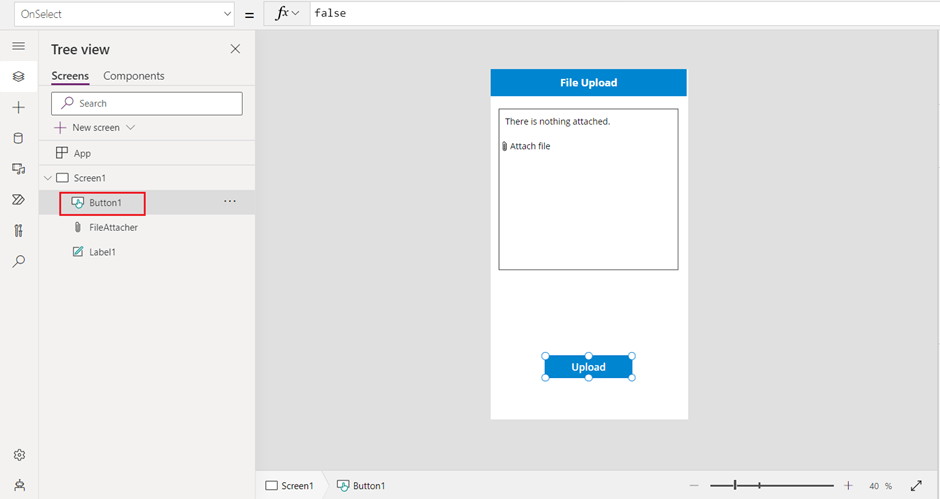
Fig.27
To upload these files we need to connect to ‘Office 365 Groups’ connector
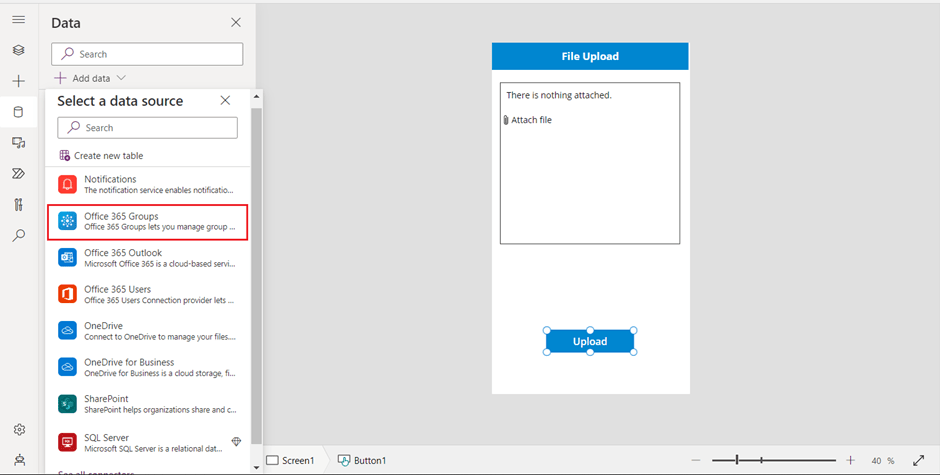
Fig.28
Then in the onselect property of the button type:

[ “https://graph.microsoft.com/v1.0/sites/834bcdaf-e566-4e88-a9e4-4ec3c330c60d/drives/b!r81Lg2bliE6p5E7DwzDGDWaiam7dmmFIs7My3kWco42kQ34Hq8E9RKM0e-rJULRu/root:/” ——> Copy this from the graph explorer Fig.26 ]
[ ‘FileAttacher’ is the name of the attachment control ]
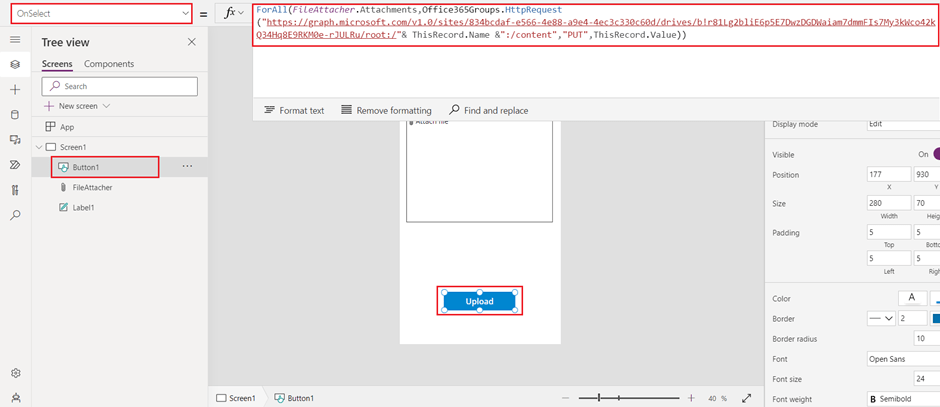
Fig.29
After that try to upload files.

Fig.30
And the file will get uploaded in the sharepoint document library.

Fig.31
Hope this helps!
