
This blog takes you through, how to upload document files from custom page opened in a model-driven form to that respective record’s newly created or already existing folders in SharePoint. This scenario is achieved with the help of a power automate flow.
The steps involved in the power automate flow are explained below:
Step 1: Select the trigger as Power Apps (V2) to pass inputs from custom page to this flow.
The “Text Input (recordId)” and the “File Content” are the two power apps inputs that are passed from the Custom Page to this flow.
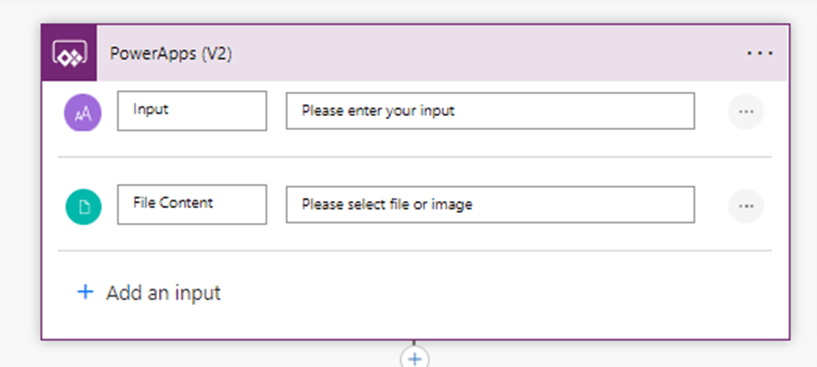
From the selected Power Apps(V2) trigger, give the inputs as “Text Input (recordId) ” and “File Content” as shown in Fig.1, for passing the inputs from custom page to the flow.
Step 2: Capture the “Partners (Account)” record’s Id from custom page for creating folders on accordance to those records.
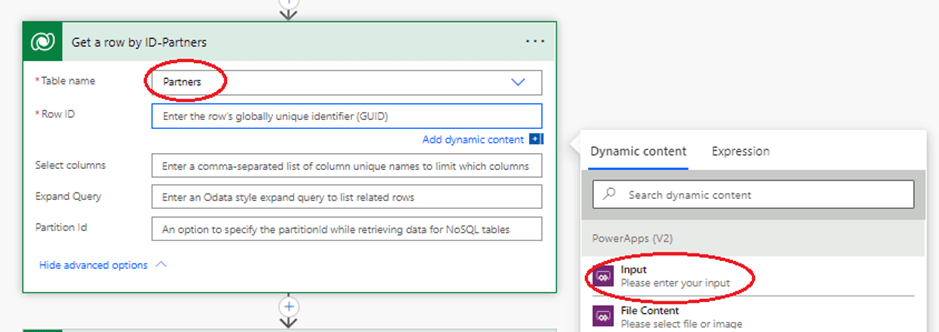
For capturing the respective record’s Id from “Partners (Account)” table, in which the custom page is opened for uploading documents, select the Text input (recordId) from Power Apps(V2) trigger as shown in Fig.2.
Step 3: Initialize variables for SharePoint Site and SharePoint Folder.

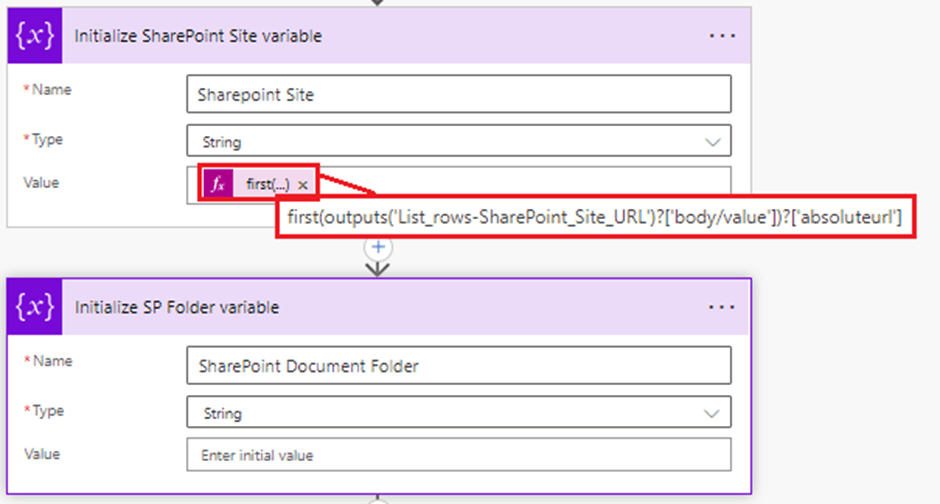
As mentioned in Fig 3 and Fig 4, this step is used to get the absolute URL of the default SharePoint site configured in the SharePoint integration and store it in “SharePoint Site” variable for future use. Another variable “SharePoint Document Folder” is also initialized to populate with the document location of the record.
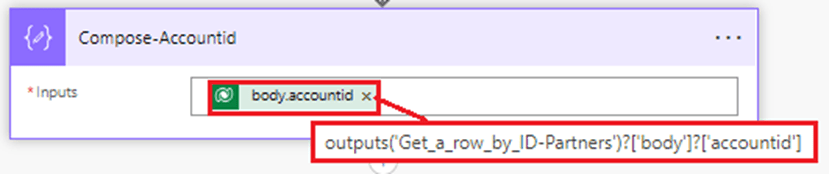
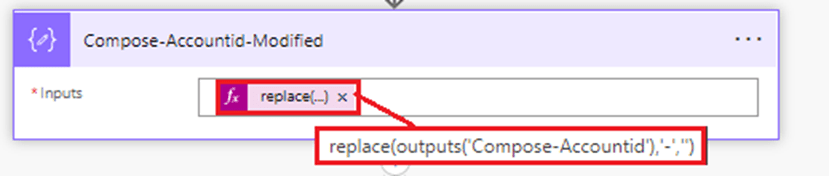
Step 4: Perform the “Compose” action to capture the “Modified-accountid” and “name” of the “Partners (Account)” record.

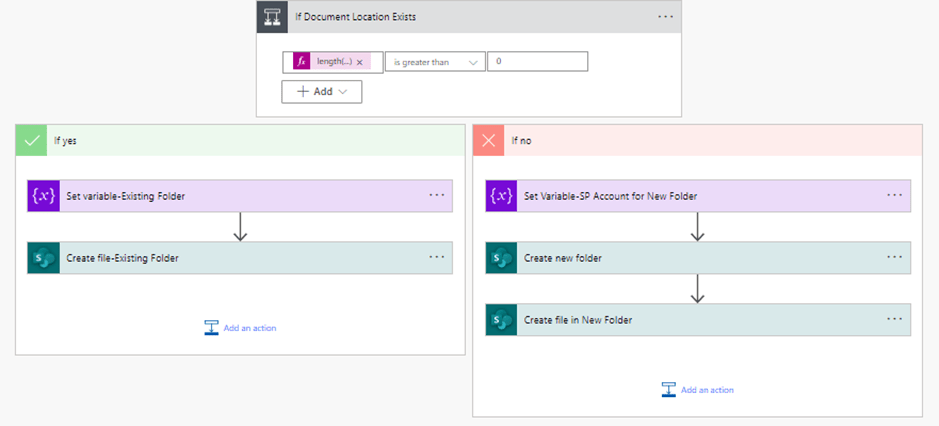
Step 5: Get the Document Location of the “Partners” (Account) record (Create new if there is none)
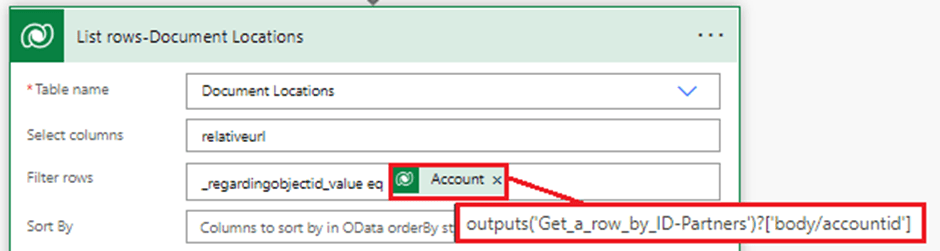
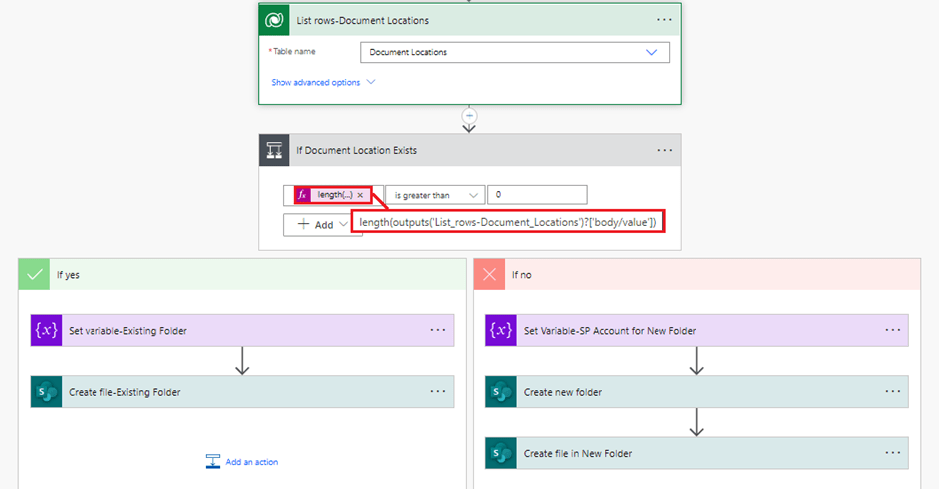
After fetching the Document Locations of “Partners” (Account) record with respect to ‘relativeurl’ using “List rows” action as mentioned in Fig.8, check whether “Document Location” exists using the condition as shown in Fig 9.
Step 6: Create files into existing folders in SharePoint after setting up the variable for existing folder.

- If there is any record existing, then set the relative URL in the ‘SharePoint Document Folder’ variable.
- After setting variable, choose the create files action in SharePoint to create file to that existing folder by providing the site address, folder path, file name and file content details as noted in Fig 10.
Step 7: Create new folders in SharePoint after setting up the variable for new folder.
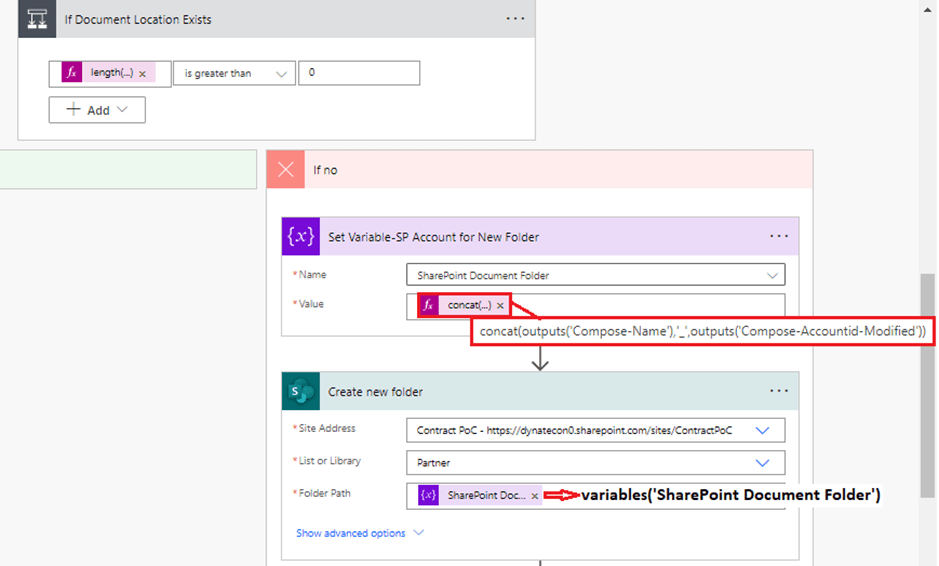
- If there is no record found, then set the ‘SharePoint Document Folder’ variable with record ‘name’ and ‘Modified Accountid’ for new folder.
- After setting up variable for new folder, you can add the create folder action in SharePoint for creating a new folder by providing the suitable site address, List or Library details as shown in Fig 11. Also, provide the folder path with the previously assigned ‘SharePoint Document Folder’ variable.
Step 8: Create files into the previously created new folders in SharePoint.
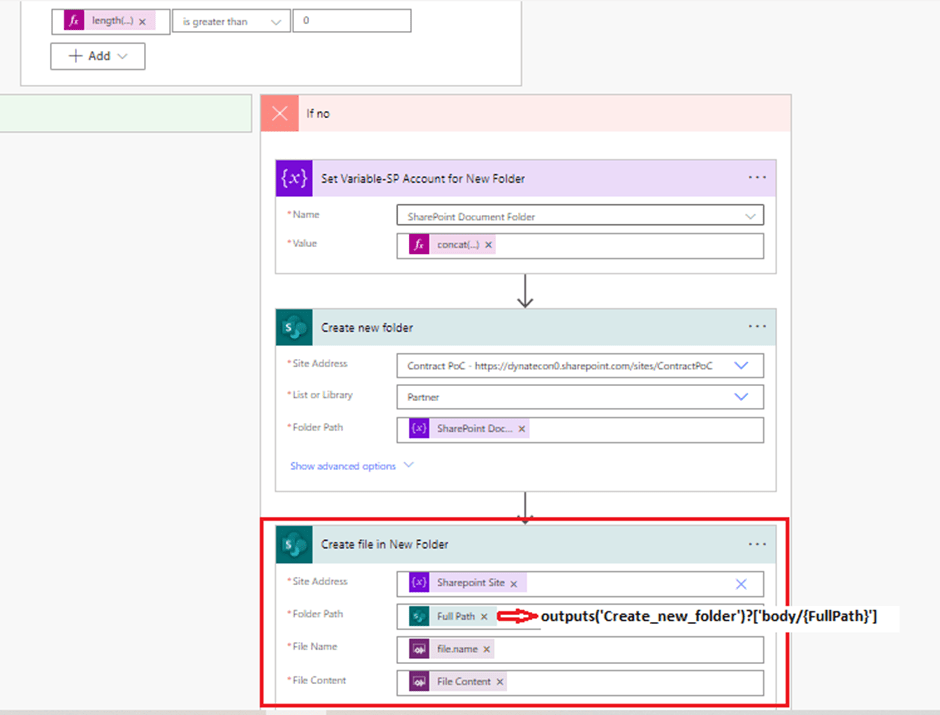
- After setting up the new folder, add the create files action in Share Point for creating files to these newly created folders by providing the site address, Full Path, File name and File content as depicted in Fig 12.
- The Full Path details can be chosen from the outputs of above “create new folder” action.
Now, overall flow looks like this:
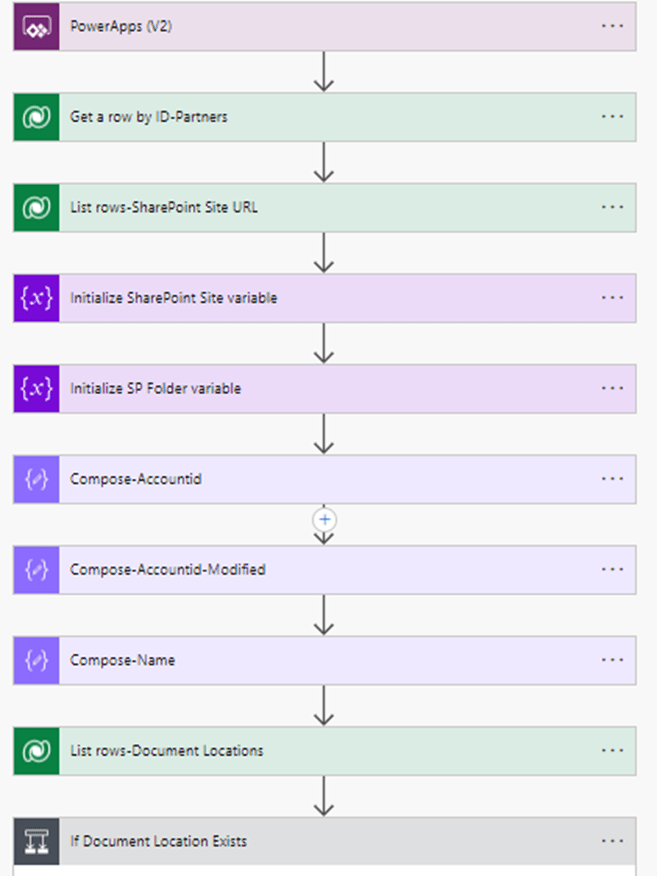

Therefore, from custom page this automate flow can be called and using these flow steps, we can upload the onboarding documents from custom pages into the respective newly created or existing record’s folders in SharePoint.
Hope it helps!
